How to Build Your Own Small- or Big-Block Chevy Engine Perch
Words and Photos: Jeff Smith
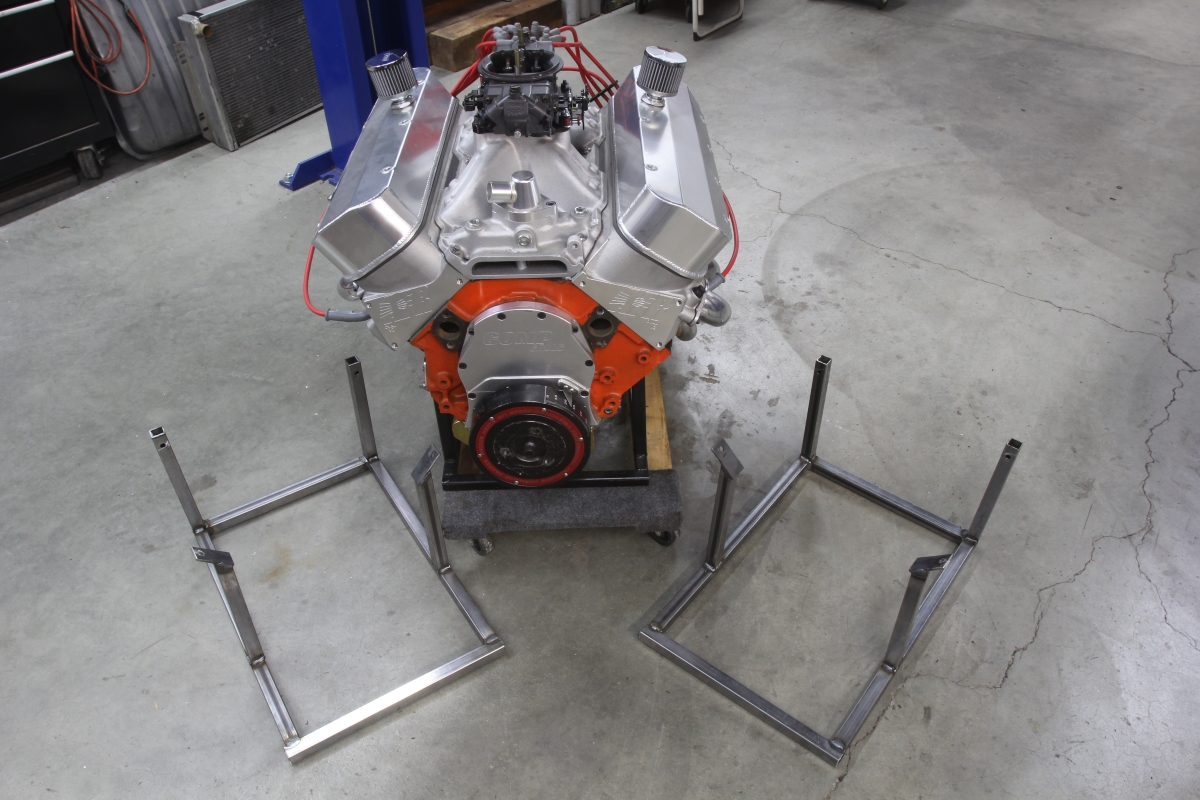
If you’re a car guy who has been in the hobby for more than a few years then you probably have a spare engine or at least an assembled long block sitting on the garage floor. These engines are difficult to store easily and even more cumbersome to quickly transport. The backyard approach for moving engines in the back of a pickup often comes down to stuffing the engine inside a large tire with nylon rope to prevent it tipping over and spilling oil everywhere. There’s a better way. With a simple engine perch such as the one we’ve built here, you can safely and easily transport a complete engine by just dropping it in the bed of your truck and strapping it down. We’ve tried a couple different universal engine perches and the affordable ones are not only rickety but are almost universally in need of modifications before they fit the engine properly. We grew tired of crutching and wrestling with stands that didn’t fit right and decided to build our own. Our plan was to build an engine perch that was cheap, sturdy, easy to build, and even easier to use.
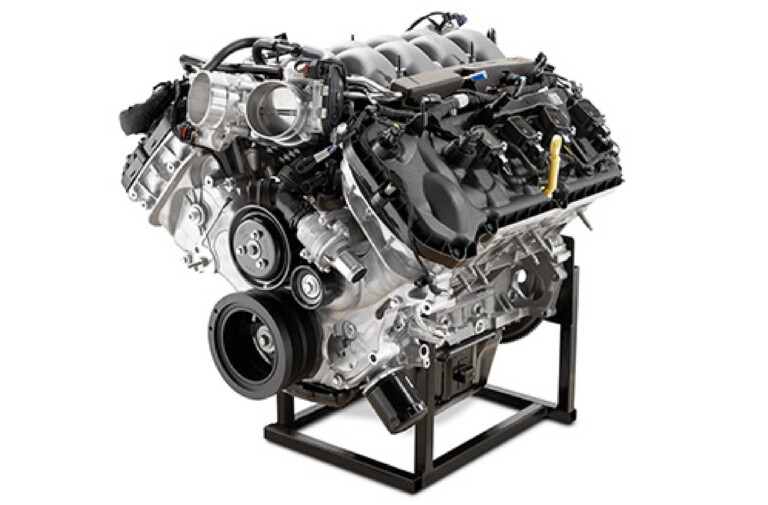
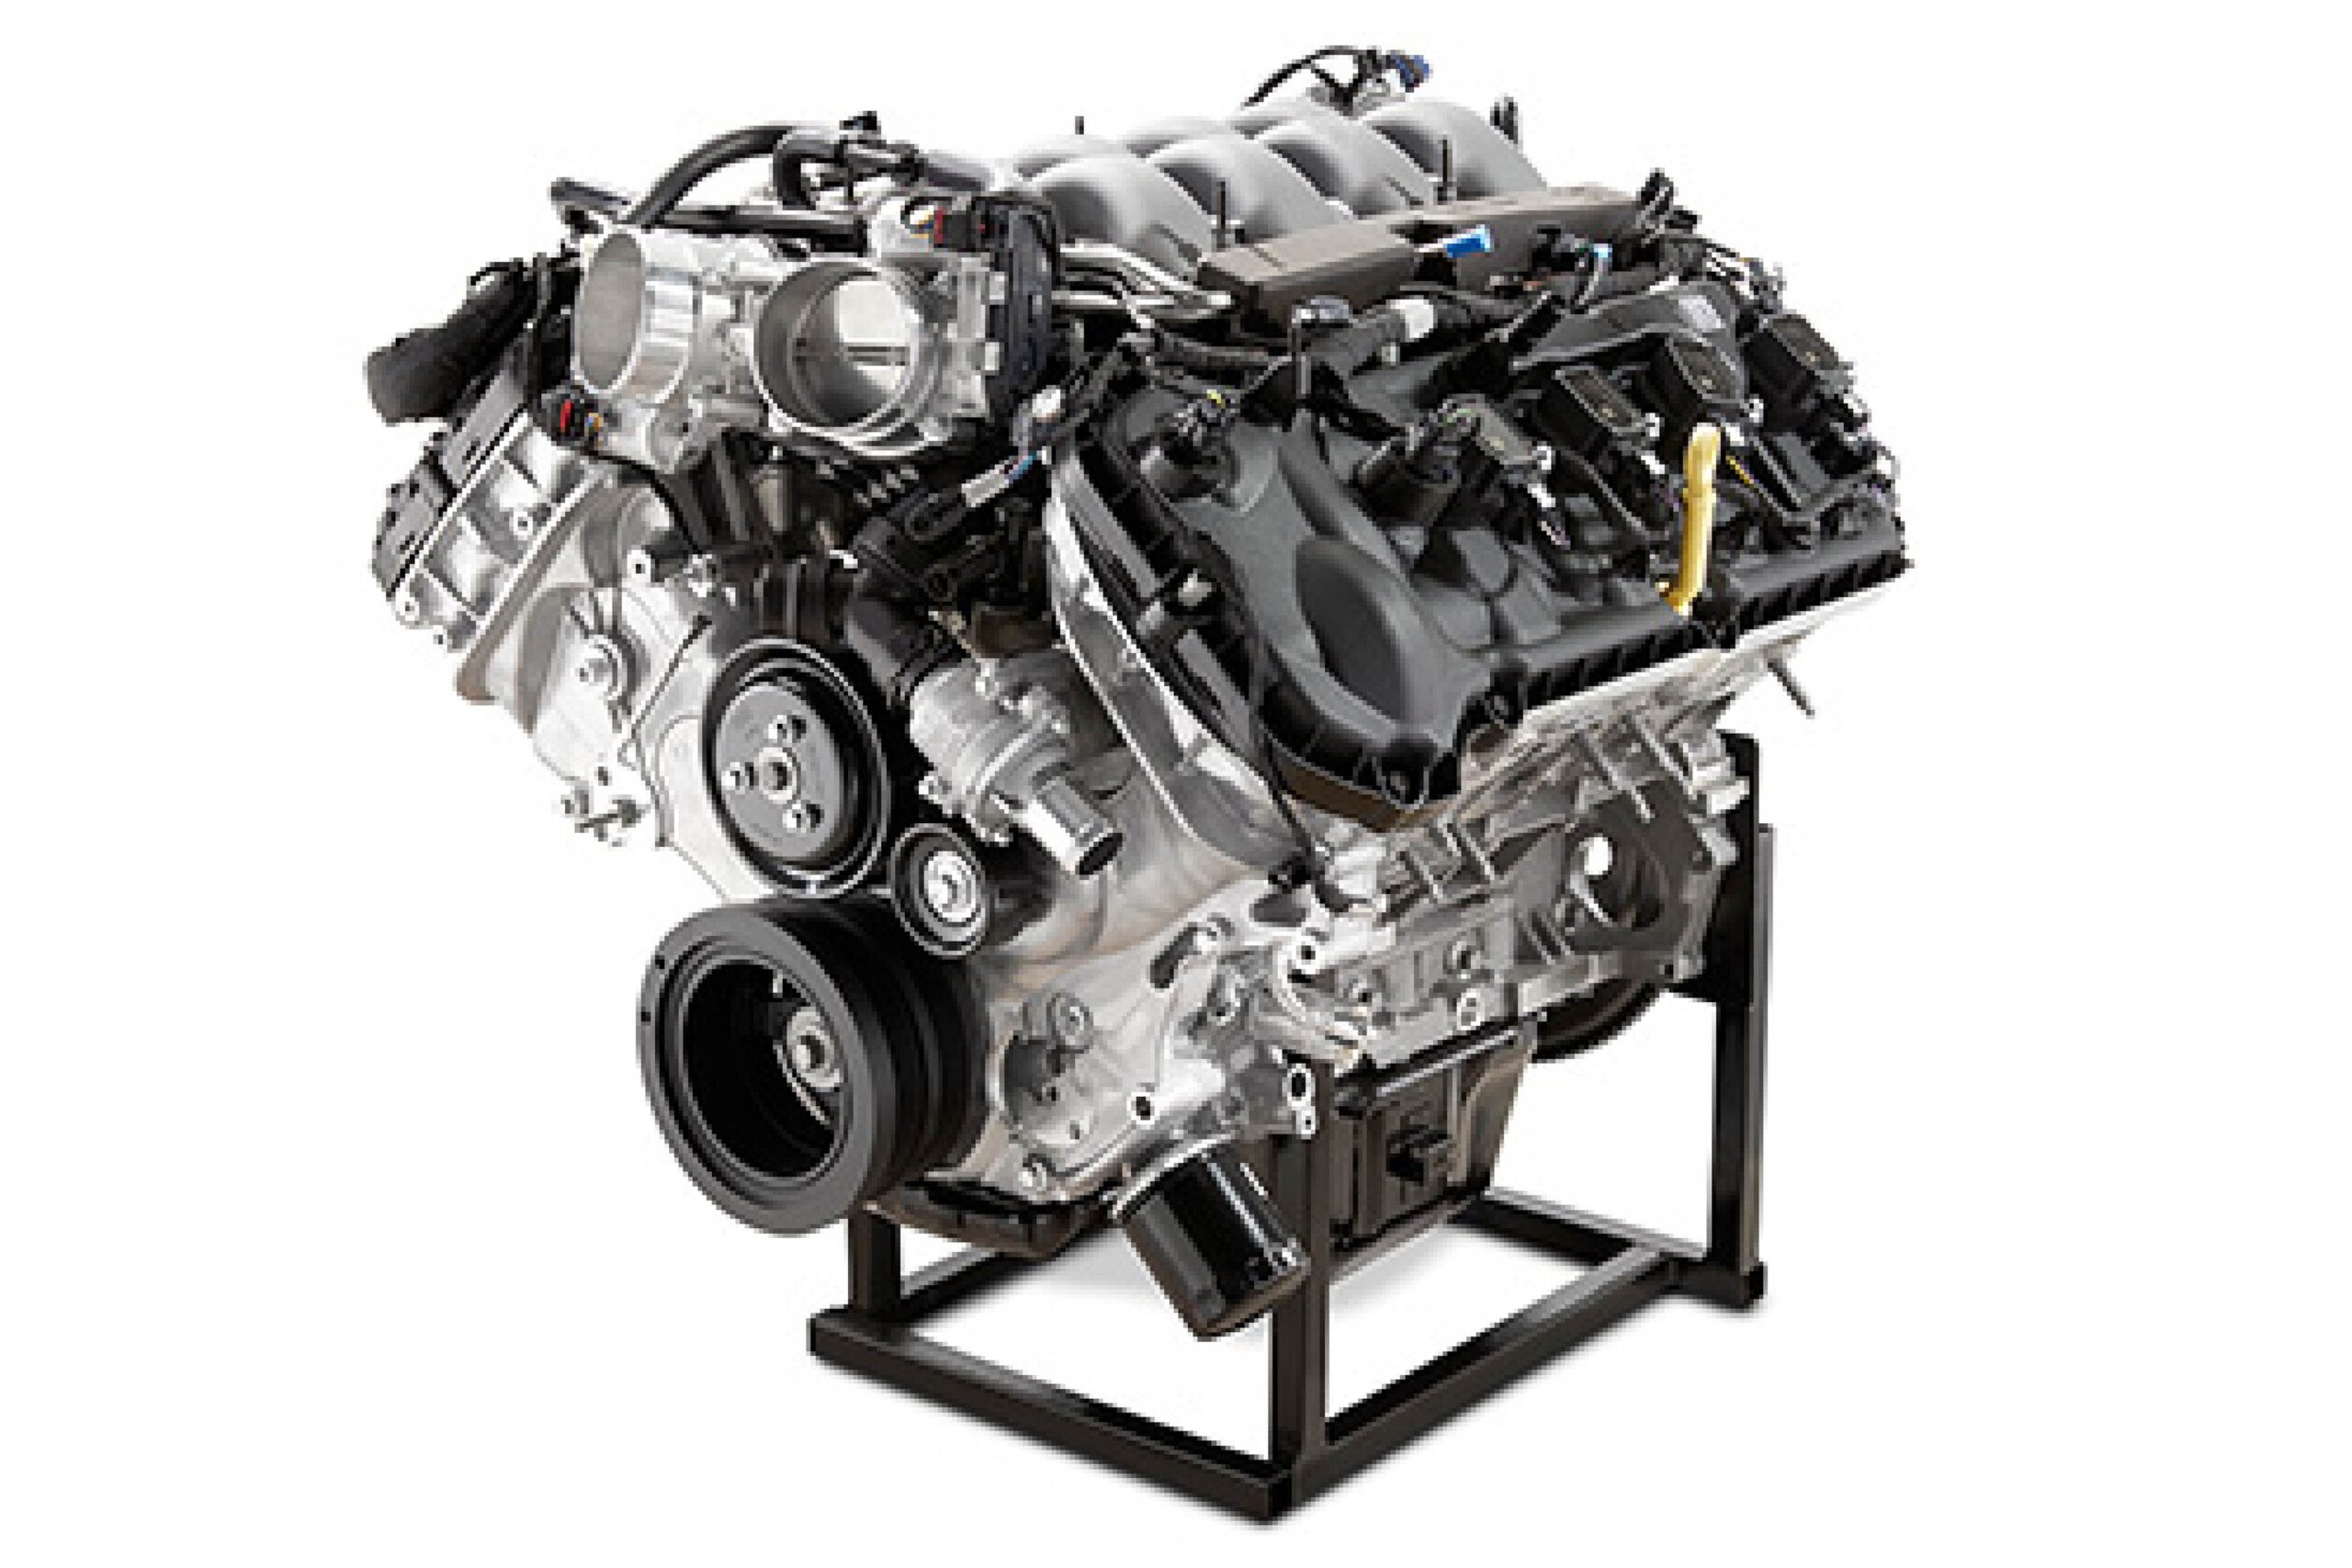
We prefer engine perches that feature a full rectangular base so that you can bolt it to an engine and drag it across the floor and not worry about the legs buckling. We also wanted a perch that could be installed while the engine was still on the engine stand so we didn’t have to struggle with a dancing engine suspended from an engine hoist chain. After several revisions, we came up with a rectangular base design with four sturdy legs that are fully welded in place and will bolt to either a small- or big-block Chevy engine. We built this to accommodate up to a 9-inch deep oil pan but by adding length to the uprights, you could easily fit a deeper pan if necessary. With some minor tweaks this stand could also be made to fit an LS engine and this same basic idea could be used to make a stand for small- or big-block Fords or Chryslers with a wider base.
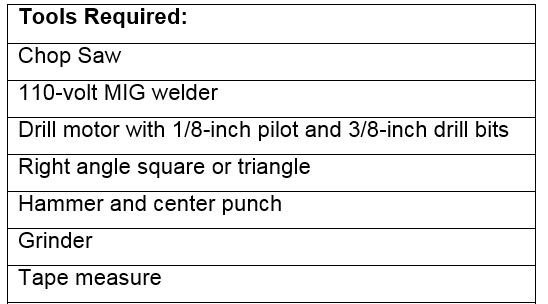
By experimenting, we discovered we could build this entire perch out of a single, 10-foot length of 1-inch square 60-gauge tubing (0.060-inch wall thickness) that our local metal dealer sells for about $9. The only other steel we needed was a couple rectangular lengths of 3/16-inch flat steel plate for the front leg tabs. Building this engine perch will require some fabrications skills and access to a MIG welder and preferably a chop saw.
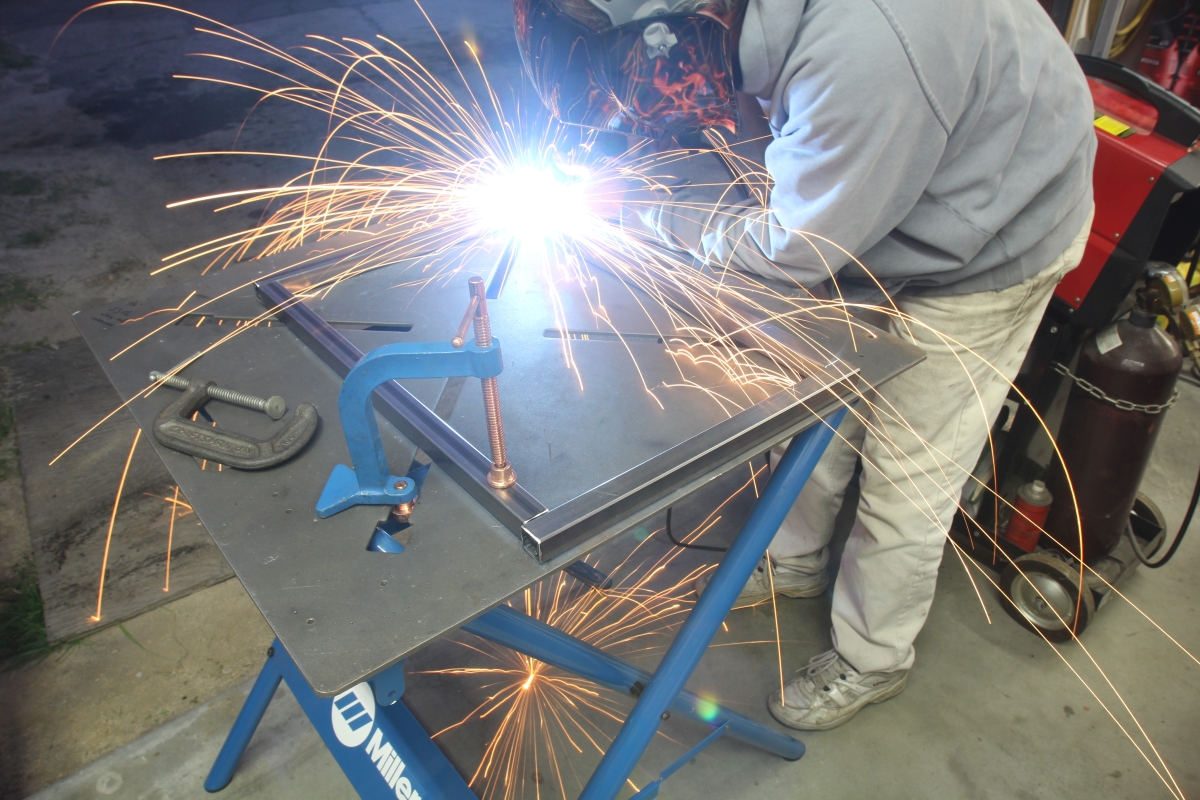
MIG welding might seem intimidating, but it’s really not that difficult. This project is a great way to learn how to MIG weld while building something that is useful. It’s beyond the scope of this story to get into MIG welding except to say that if we can do it, just about anybody can. We’re not great at it, but good enough to get the job done. You might even build a few of these for your friends. We found it doesn’t take much more time (or money) to build three as it does to build one. You might as well built at least two because your friends are going to want to borrow them and you know they will forget to bring them back. We’ve probably built 20 of these stands and yet we never seem to have an unoccupied perch to transport an engine. So we built three more because we have lots of friends.
With ten feet of one-inch square tubing and a couple of short, 1/8 or 3/16-inch plate tabs, you can easily build one of these perches. The material cost is less than $15.
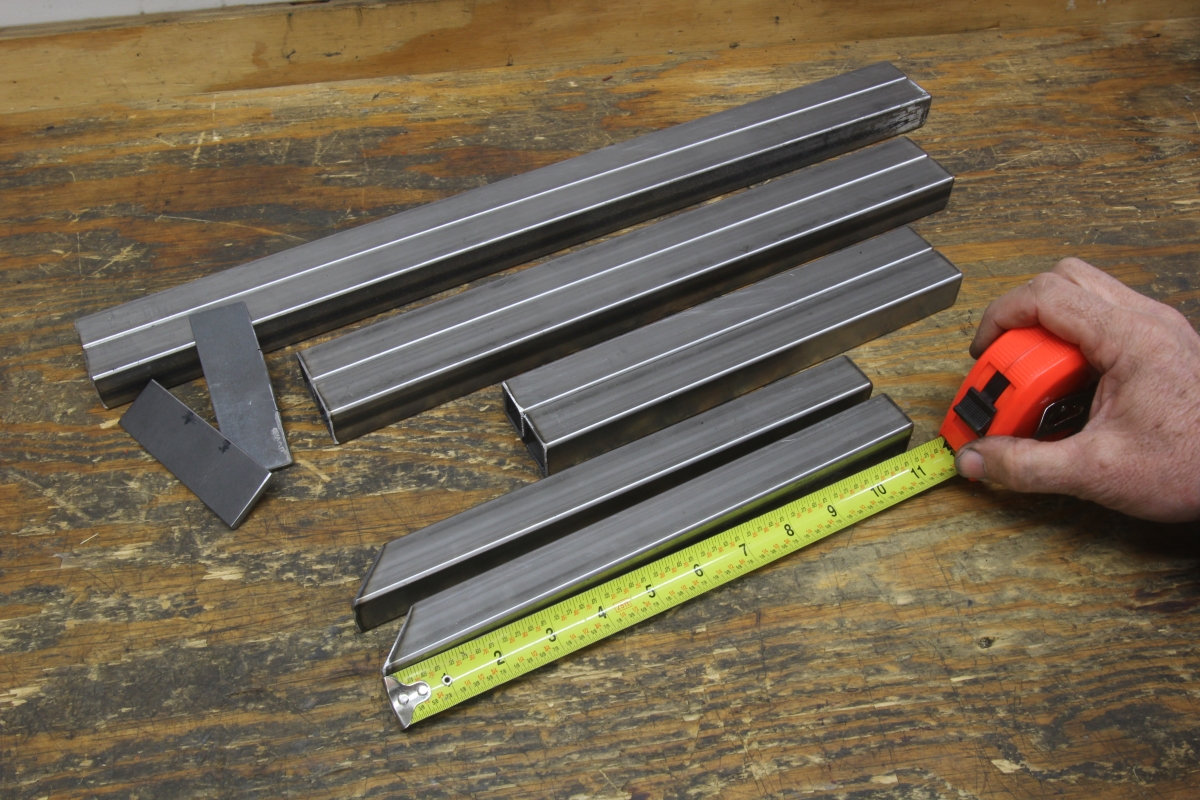
We drove to our local metal outlet, Industrial Metal, in Sun Valley, California and bought three, 10-foot lengths of 60-gauge steel tubing and cut them using our chop saw. The base for the perch consists of four pieces: 2 each at 22 inches and 2 each at 16 inches. The rear legs for the perch are 2 each at 10½ inches. The front legs are cut with a 45- degree angle. The long side of the angle cut is 11 inches in length with the short side 10 inches. The last two pieces are tabs cut from 3/16-inch plate that measure 1¼ wide x 2½ to 3 inches long. They can be longer if you prefer.
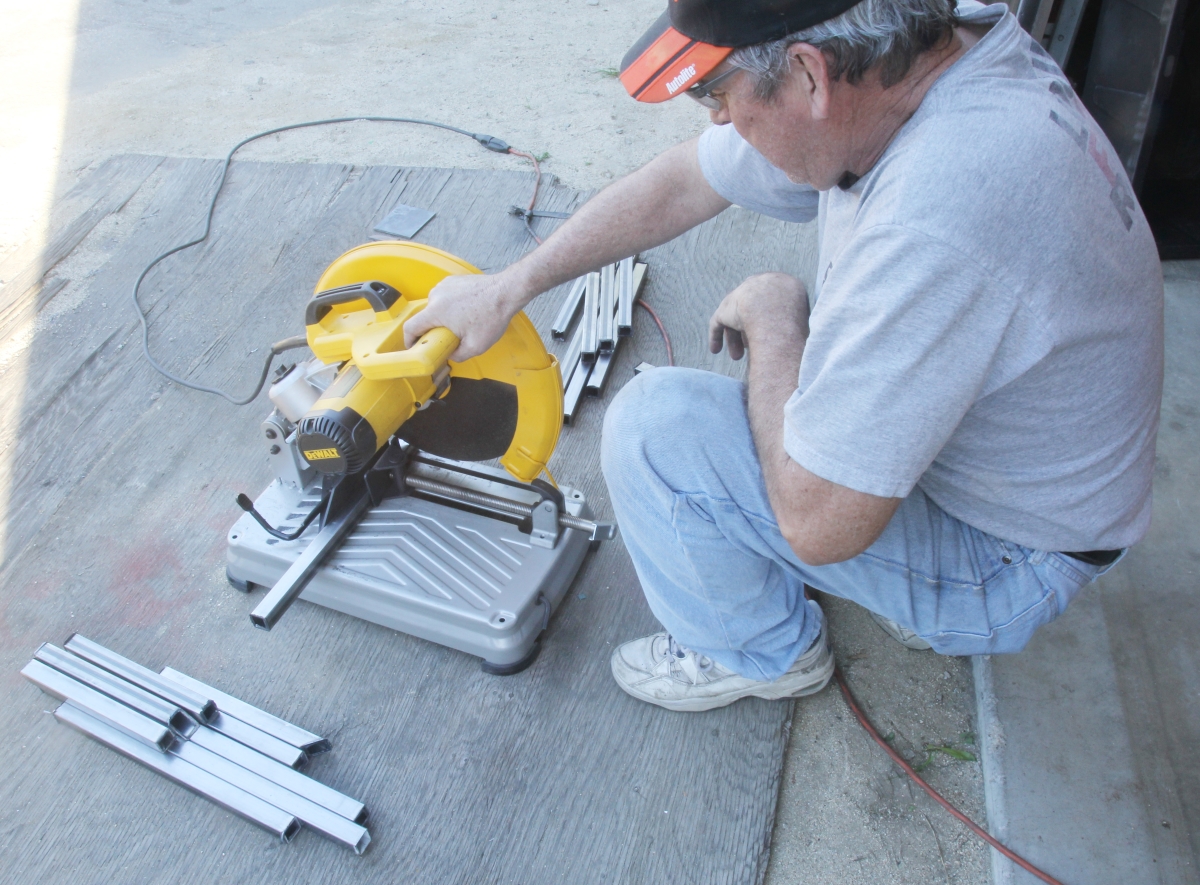
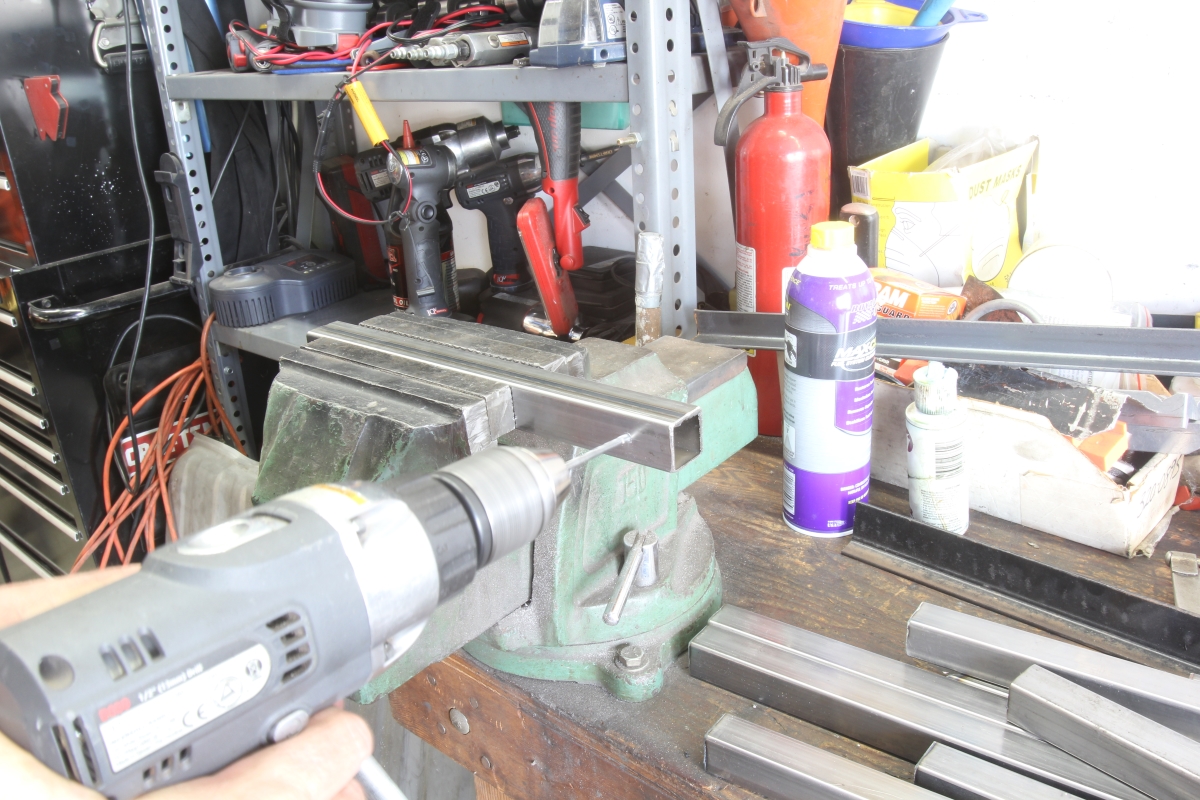
Cutting the tubing is much easier with a chop saw with an abrasive disc. This makes the job easier than using a hack saw or a small cut-off wheel. Cut the longer pieces first, so you only have to make one 45-degree cut. There will be a short (roughly 1-inch) length of scrap that will need to be removed from the last angle-cut leg. We then used a grinder to clean up the flashing left by the chop saw.
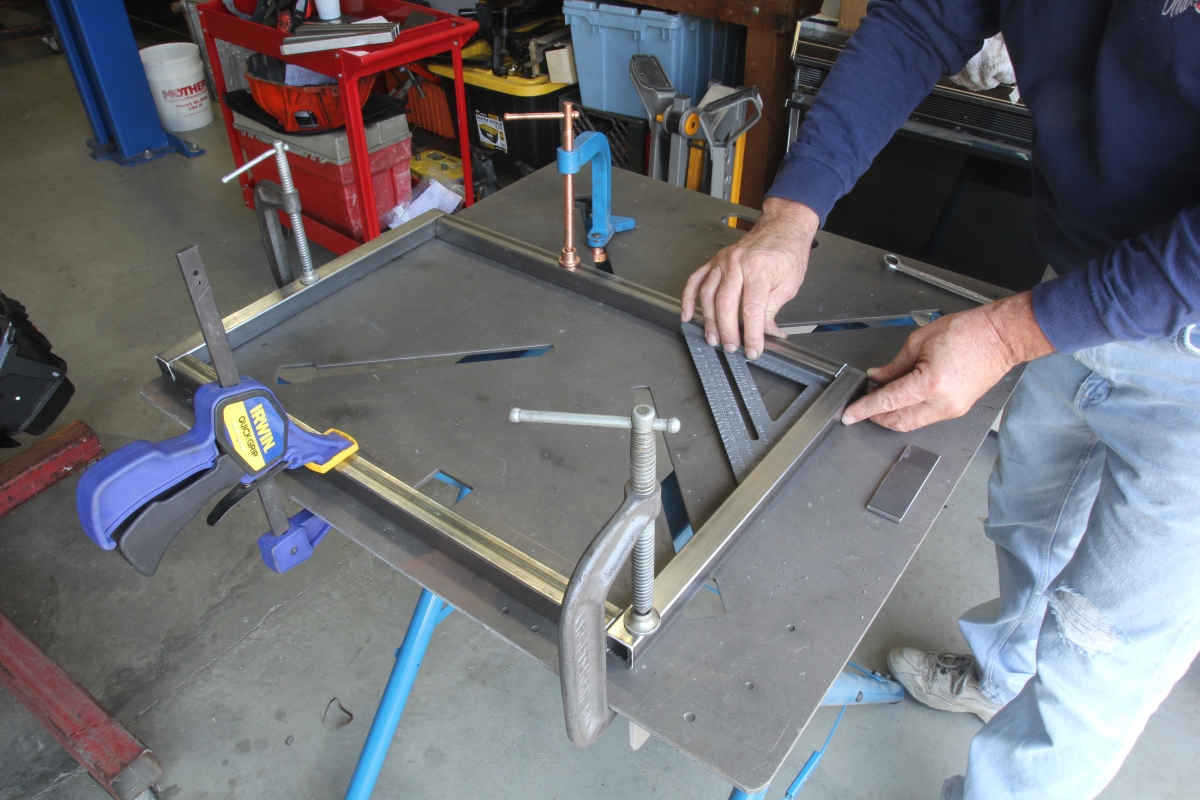
We used a Miller welding table to do the work, but a smooth shop floor will also suffice. Start by constructing the base. Place the 16-inch lengths over the end of the longer 22-inch lengths to form a rectangle that measures 24 x16 inches. We used a triangle to ensure our angles were square.
We first tacked all four corners together and rechecked to ensure the angles were still square and then welded the rectangle and set it aside to cool.
Next, we marked and drilled the rear legs (10 ½ inches long) that will bolt to the two bottom bellhousing bolt holes. Measure 1 inch down from one end and center punch in the middle of the tubing. Drill the hole for a 3/8-inch bolt. We started with a 1/8-inch pilot hole and then used one size larger bit than 3/8 to make it easier to fit the bolts.

We cut these 3/16-inch thick steel plates that will be welded to the angle cut front legs for the perch. They are marked 2 ½ inches long but can be longer. We marked the plate about one inch down from one end for a 3/8-inch hole that will bolt to either the front or rear upper motor mount bolt holes on the engine. These motor mount bolt holes are the same distance from the bellhousing flange for either a small- or big-block Chevy.

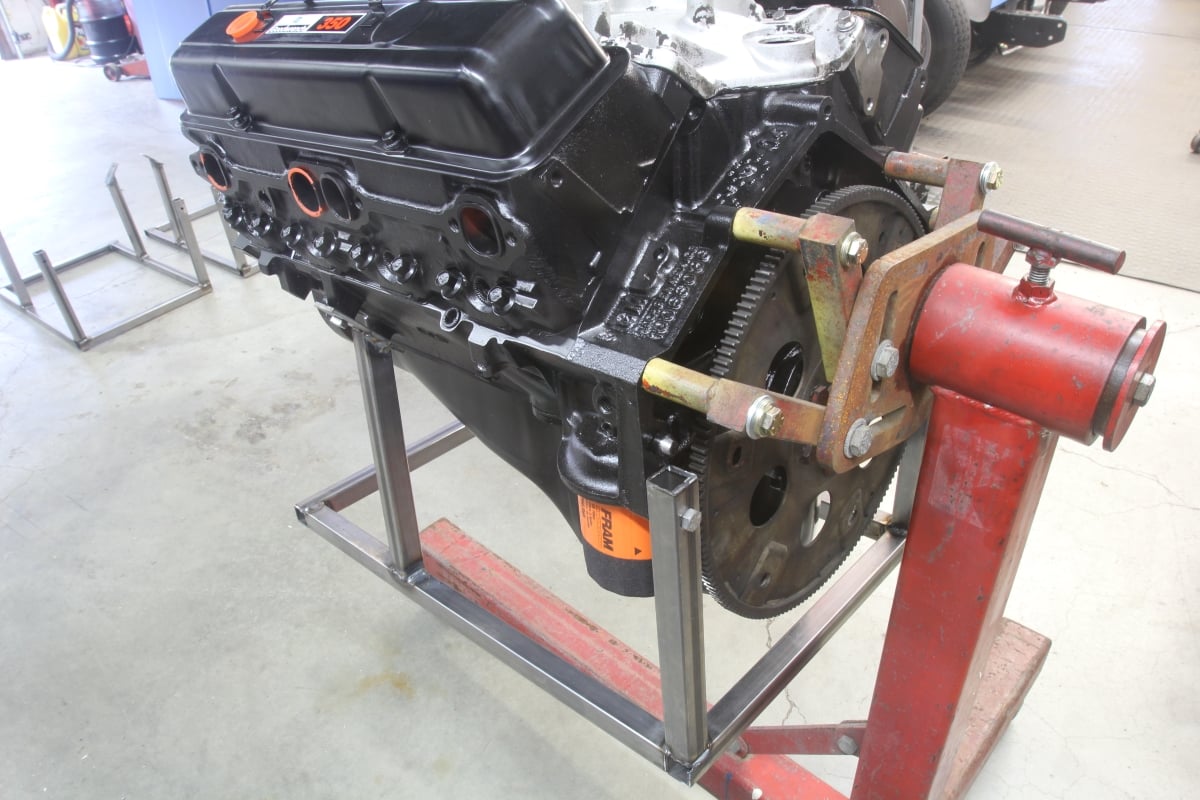
We used a complete small-block on the engine stand but any bare block will also work. We inverted the engine (make sure there’s no oil in it) and attached the rear legs to the bottom bellhousing flange bolt holes. Make sure the engine is nearly level as this is important for the next step. The legs don’t have to be perpendicular to the base and may need to be angled slightly to fit the base.

We made a simple angle iron tool to bolt to the front of the engine to support the base on one side. We missed on our length estimate and needed a ¼-inch plate between it and the base to make the base level.
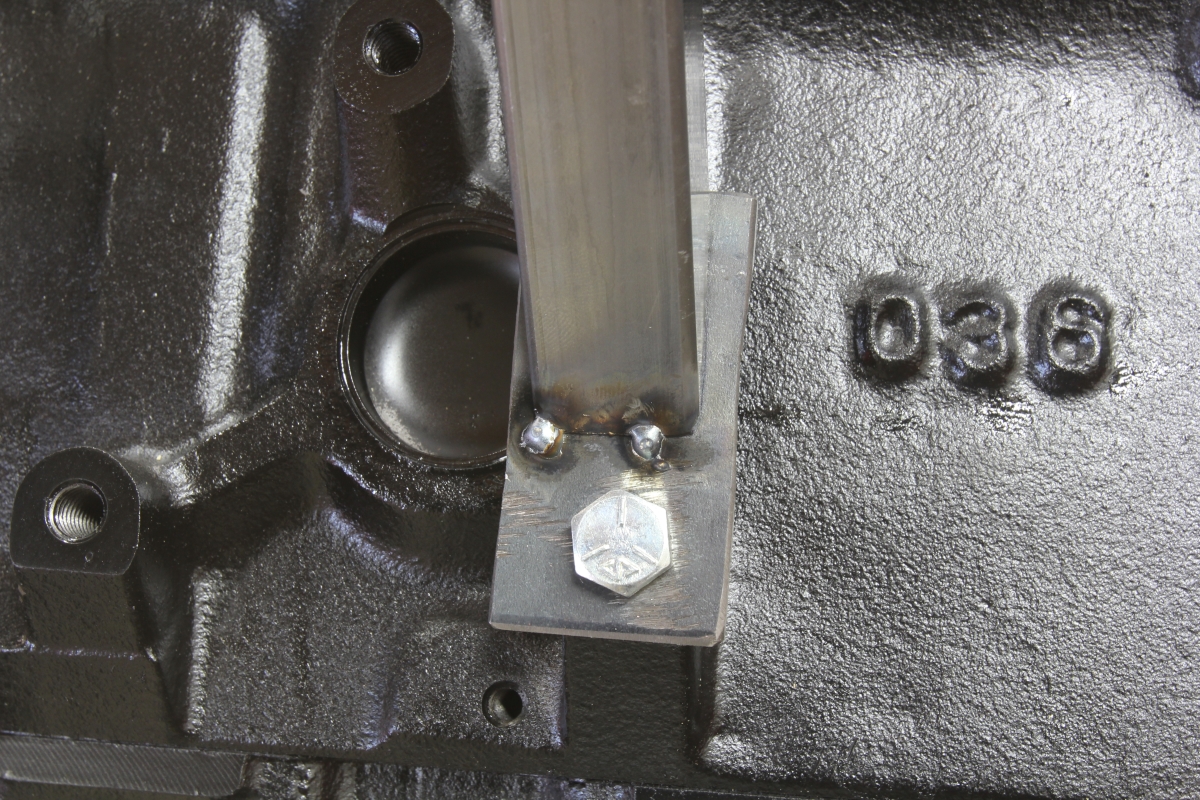
This is probably the hardest part. Bolt the tabs to the block. You can place the legs either of the two upper motor mount bolt holes. For this mount, we chose the rear holes. Now place the angle portion of one front leg so it is centered on the tab and also tight with the base. Here’s where a friend can help with holding the leg while you tack the leg to the tab. Don’t tack the front leg to the base just yet.
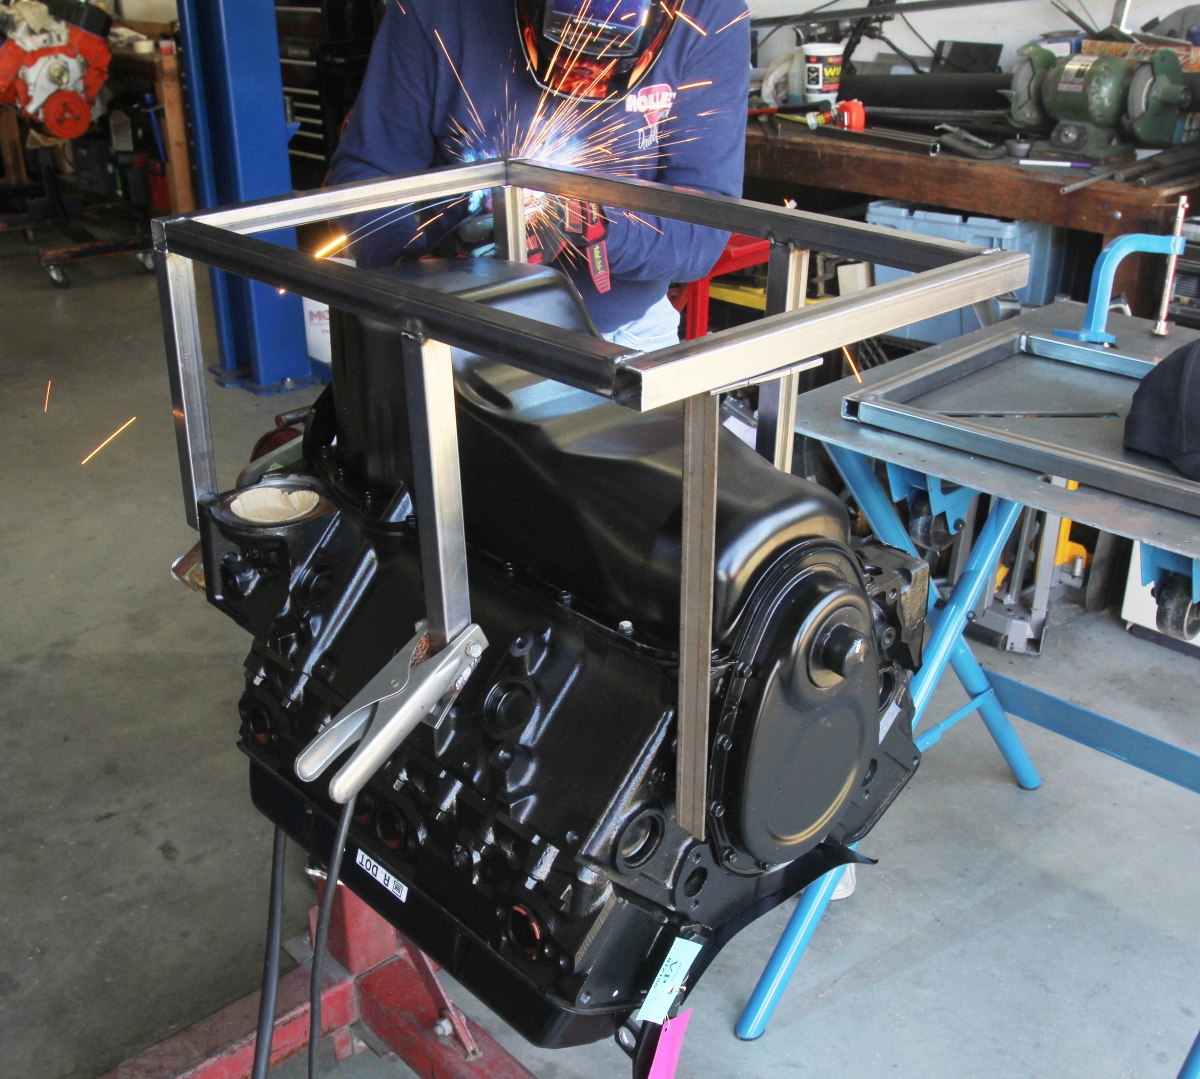
With both front legs tacked to their respective tabs, you can now tack-weld the front and rear legs to the base. Tack all four corners of each leg to the base. Once every leg is solidly tacked, you can weld the whole mess together. We are just finishing tacking all four legs to the base here on the engine. We then moved to the table to complete the welding.
We took our time welding the legs to prevent heat distortion and checked the fit a couple of times before finishing the work. With this style perch, we can bolt the perch to the engine while on the engine stand. This requires attaching the engine to the stand using the top four bellhousing bolts. We use two 3/8 x 2 ½-inch NC bolts for the rear legs and a pair of 3/8 x ¾-inch long bolts for the front. If you really want to be trick, you can attach a set of four Nut Serts in the front cross bar to keep the bolts with the perch.