Stop giving your engine machinist cash to do a job you can easily do yourself
Words And Photos: Jeff Huneycutt
Few of us have the machinery on hand to bore and hone cylinders or deck a cylinder head. That’s what engine machinists are for. They have invested in all the specialized equipment necessary to do the work. Hopefully, your favorite machinist has the skills to go with the equipment to provide you with consistent, high-quality machine work. When they do, it’s money well spent.
But that doesn’t mean you are obligated to spend any more money than you have to.
Another task that many will leave to their engine machinist is installing the cam bearings. That’s because pressing the cam bearings into the bores can be a tricky task without a specialized cam bearing installation tool. You can try to simply hold the bearing in your fingers and bang it in with a hammer, but poor results are likely.
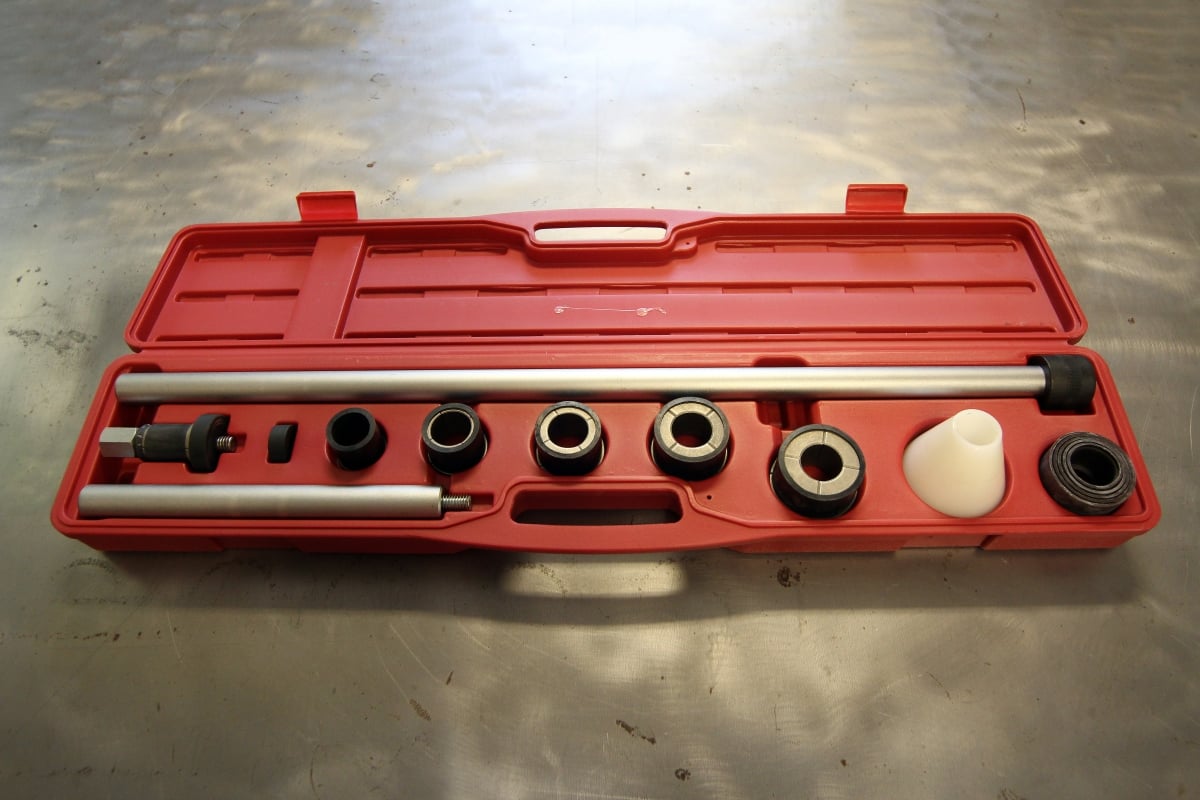
The cam bearing installation and removal tool from JEGS includes everything needed to work in engines with cam bearings that range in size from 1.125 inches all the way up to 2.690 inches.
If you don’t hold the cam bearing perfectly square with the bore during installation, you can shave off material from the back of the bearing against the side of the bore, which will get caught between the bearing and the block. This excess material will change the shape of the inside diameter of the bearing, creating tight spots that will reduce oil flow in that critical area. A machinist may charge only $40 or $50 to install cam bearings, so many just consider the extra cost a necessary evil, especially since a quality cam bearing installation tool usually runs well over $300.
But now JEGS has a Cam Bearing Installation Tool they are offering for $172, which is a smoking deal. It’s still an investment, but the tool pays for itself with just three or four installs. Even if you aren’t doing any machine work to your block, any time you do a complete teardown, the cam bearings need to be removed before cleaning the block.
We put JEGS new Cam Bearing Installation and Removal Tool to the test at KT Engine Development in Concord, North Carolina. The kit includes everything you will need (except for a hammer) to install or remove cam bearings in a wide variety of engines and bearing sizes. In fact, it will work with bearing sizes from 1.125 inches all the way up to 2.690 inches. There’s even an extension to the bar which should prove invaluable when working with longer engines like a straight six.
The first step for proper cam bearing installation is to put down the cam bearings and the install tool and pick up some lint-free towels. The cam bearing bores must be absolutely clean. Wipe down both the bores and the outside of the cam bearings with a fast drying solvent before installation. Also, the back of the bearing must be dry when installed in the block. You may think a little bit of oil would aid assembly, but the bearings are designed to be installed dry for best performance.
You should also take time to make sure you are installing the correct bearings in the correct bores. Some engines, like the Chevy small block, are stepped, meaning the cam bearing housing bores can vary in size based on the position. If so, the proper location for each bearing will be labeled on the box. Arrange your bearings so that you can work from the rear of the block forward.
Finally, while installing the bearings, always make sure the oil hole in the bearing is lined up with the oiling hole in the block. This may sound obvious, but sometimes can be easy to forget. Some blocks may have grooves that allow the oil to flow around the back side of the bearing before entering through the hole. This arrangement gives you more latitude when deciding where to place the hole. But instead of just allowing it to fall where it may, try to place the bearing’s oil hole between the 2- and 3-o’clock position (when the block is oriented upright). The top half of the bearing doesn’t see pressure from the cam, so placing the oil hole at 3 o’clock or above allows the oil to enter without having to fight against the engine. The camshaft rotates clockwise, so from the point it enters, it can form an oil wedge and flow down to the bottom half of the bearing and support the spinning camshaft.
With the right tools, installing your own cam bearings isn’t tricky, and over time it can definitely save you money. Besides, building your own engines is one of the most rewarding things any gearhead can do. So build as much of it as you absolutely can.
(1) The first step is to choose the correct size expanding driver for the correct bearing size. Remove one segment by squeezing the driver until one of the segments pops out.
(2) Insert the expander assembly into the driver until the collar of the driver rests against the collar on the expander.
(3) Now you can insert the fourth section of the driver back in place.
(4) After sliding the white guide cone over the driver bar, Ken Troutman of KT Engine Development threads the expander assembly onto the bar.
(5) Here’s a look at what the completed assembly looks like.
(6) Insert the driver through the front of the block through the cam bearing housings until just before the rear bearing housing. Make sure the expander assembly is at its smallest size and slide the appropriate bearing over the driver.
(7) Slide the bearing back until it rests against the shoulder of the driver, then grab the hex and spin the bar clockwise to expand the driver. If it is too hard to reach, you can also use an open end wrench to hold the expander while spinning the bar. Either way, open up the expander until the bearing is firmly held in place.
(8) The key to properly installing the bearings is to keep them square to the bores while driving them into place. The tool makes this easy to do by sliding the guide cone into the first cam bearing bore so that the driver bar always stays centered.
(9) Using a large mallet or dead blow hammer, strike the back of the driver bar to press the bearing into place. Make sure the oiling hole matches up with the oil gallery exit in the block. And if you go too far, you can insert the driver from the other side and press the bearing back the other way.
(10) After getting the bearing in place, work your way backwards toward the front of the block. A light can help you make a quick check to confirm that the oiling hole in the bearing is correctly aligned over the hole in the block feeding oil from the cam bore to the main bearing.
Source
JEGS
jegs.com