![DSC_0253[1]](https://www.speednik.com/wp-content/blogs.dir/1/files/imp/sites/4/2017/03/DSC_025311.jpg)
The ATI Performance Products harmonic dampers have become extremely popular for engine builders and racers. They offer engine protection, and are available for many Mustang applications. There’s no argument that these dampers are made for high performance use, so naturally, Ivan’s 2015 Ford Mustang with Roush Performance TVS was our test mule.
So let’s get started with a few things to keep in mind:
The front bumper does not need to be remove to perform this install. We had the bumper off for other reasons. This job can be done with basic hand tools and a trusted 3 prong balancer puller and a long reach harmonic balancer installation tool.
Our car does have a Roush TVS supercharger on it, so a step or two will be different but we will cover that when the time comes.
REMOVAL
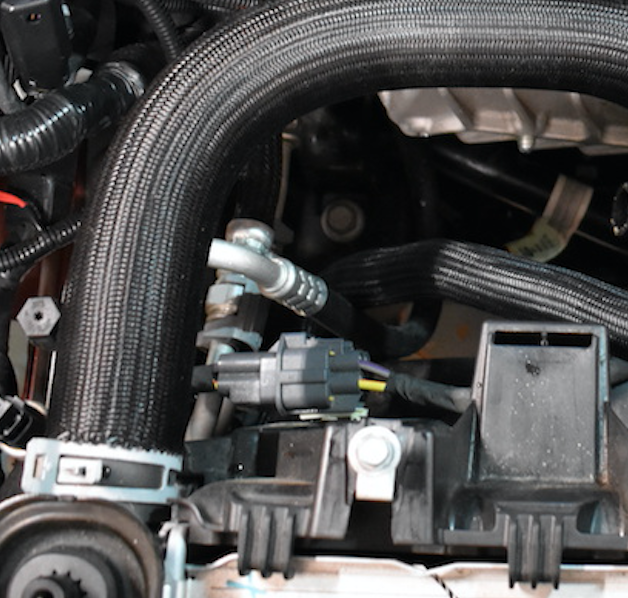
1. Make sure to grab two clean drain pans so you can reuse the coolant. Drain the engine coolant. As shown in the pictures above. On our supercharged model we had to also drain the supercharger intercooler system. The intercooler pump is located right by the windshield washer reservoir. We chose to pull the feed hose and let it drain into the pan.
![DSC_0235[1]](https://www.speednik.com/wp-content/blogs.dir/1/files/imp/sites/4/2017/03/DSC_02351.jpg)
2. Remove the engine coolant overflow tank. Two retainers are located on the top by the radiator cover. Two smaller hoses leading to the tank need to be removed also. One hose on the bottom and one on the top right.
3. Then, remove the supercharger intercooler tank. Two retainers are located on the top by the radiator cover. Two smaller hoses leading to the tank need to be removed also. One hose on the bottom and one on the top in front of the cap.
4. Remove the upper radiator hose.
5. Use a ratchet and socket to rotate the tensioner to remove the alternator and water pump drive belt.
![DSC_0243[1]](https://www.speednik.com/wp-content/blogs.dir/1/files/imp/sites/4/2017/03/DSC_02431.jpg)
6. Remove the three bolts on the water pump to remove the pulley. We did this for the added room and to make sure we have a clear view for the install.
7. On basic GT models you would next remove the AC belt.
** On our supercharged model we had to use a breaker bar and socket to rotate the tensioner to remove the belt.
![DSC_0246[1]](https://www.speednik.com/wp-content/blogs.dir/1/files/imp/sites/4/2017/03/DSC_02461.jpg)
8. Remove the two radiator fan mounting bolts. They can be found at the top right and top left sides of the fan shroud.
9. Remove the large grey wiring connector, for the fans, found on the passenger side of the shroud. Then the fan and shroud assembly will pull right up and out.
![DSC_0247[1]](https://www.speednik.com/wp-content/blogs.dir/1/files/imp/sites/4/2017/03/DSC_02471.jpg)
10. Using an electric or air impact remove the factory damper bolt. Make sure to remove the large washer behind the bolt.
![DSC_0248[1]](https://www.speednik.com/wp-content/blogs.dir/1/files/imp/sites/4/2017/03/DSC_02481.jpg)
11. Attach your 3 prong puller to the balancer and pull the balancer off. Be sure to go slow here and take your time.
BALANCER ASSEMBLY
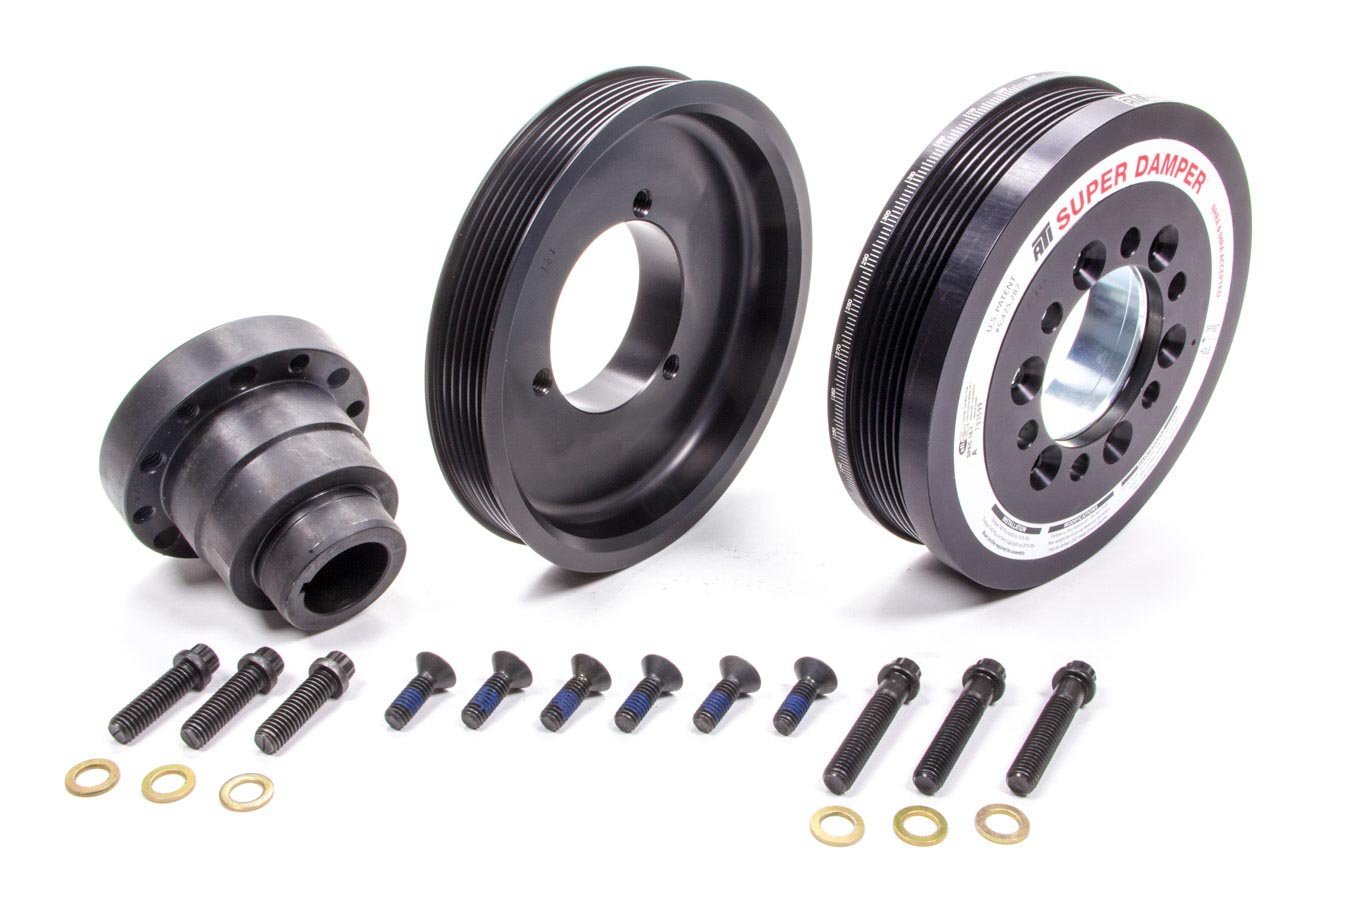
For balancer assembly please follow the instructions included with your balancer provided by ATI Performance Products.


*The Super Damper shell assembly is indexed to the crank hub with an offset hole marked by an indent dimple on the front of the hub and on the front face decal with an arrow. These must be aligned for proper assembly.
INSTALLATION
![DSC_0249[1]](https://www.speednik.com/wp-content/blogs.dir/1/files/imp/sites/4/2017/03/DSC_02491.jpg)
Editors Note: Per the ATI Damper instructions make sure to check the damper hub to crankshaft clearance. These dampers are an interference fit and may require you to hone the damper hub to make sure it is within ATI spec.
1. Make sure both surfaces are crystal clean, one spec of dirt can gall the hub & crank snout up. Also be sure to remove the factory applied silicone off the keyway of the crankshaft.
2. Put anti-seize on the snout and an oil resistant silicone in the keyway slot of the new balancer.
3. Have your long reach harmonic balancer install tool ready.
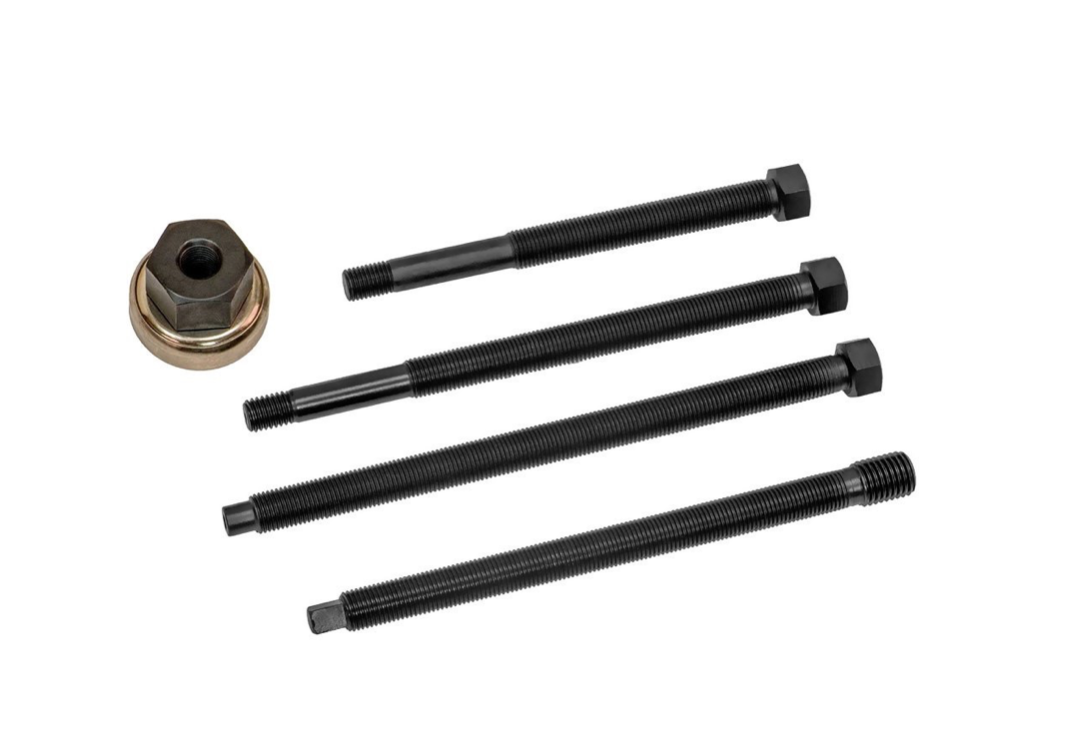
Long reach harmonic balancer installation tool
Slide the new ATI Performance Products damper onto the crankshaft. Make sure to line up the keyway and not damage the crankshaft. It will only go on a little bit. Grab your installation tool and follow the tool instructions to pull the balancer onto the crankshaft. Make sure to follow the tool instructions carefully so the crankshaft is not damaged.
**Factory crank bolt is a one time, torque-to-yield, and must be replaced. We recommend replacing with a high-performance ARP bolt and using red loctite and torque to 120 lbs-ft.
FINAL ASSEMBLY
Install everything in the reverse order of removal. Once everything is back together make sure to refill the coolant and check for leaks.