
John Bianchi added an EZ-EFI 2.0 to his small-block Nova, and we improved its throttle response and drivability with a couple of simple tuning tricks overlooked by the original installer. Even an EFI system with self-learning capabilities can benefit from some simple ignition techniques that can add solid performance improvements.
Words and Photos By: Jeff Smith
You’ve successfully followed the instructions for installing your EZ-EFI 2.0 throttle body fuel injection system. The engine immediately started and has been running well for a couple of weeks. It has a couple of minor faults – but nothing serious. This is where most enthusiasts figure they have completed the task. But, in most cases, there’s more to be gained with a little extra tuning.
The response we hear quite often at this point is, “The reason I bought this system is because it’s self-tuning – so I don’t have to.” On the surface that may be true, but as with any sophisticated system, there are ways to make it operate even better. Let’s look at this from the manufacturer’s point of view. They have to build a system, like the EZ-EFI 2.0, that is designed to control fuel and spark for a tremendously wide range of engine displacement. The EZ-EFI could potentially be bolted to a mild Chevy 283 or to a pretty healthy 520c.i. stroker big-block Ford. The injectors flow enough fuel to feed upwards of 1,200 hp! While the instructions to get the system running for both engines are the same, there will be some tuning aspects that should be optimized for both of these combinations.
-

- The Xtreme Street class is also very similar to the first round. Bob Kurgan moved up from 12th to 7th with a 8.250 @ 157.12 mph pass.
-

- Mike Fratena sits at the top of the Street Radial class with his record 8.544 pass from last night. Heath Shemwell gets a complete 8.749 pass after his first round wheel stand and Jessie Carter joins the mix with a 9.015.
We thought we’d take a closer look at tuning the spark control side of the EZ-EFI 2.0 system to show you how you can optimize it to work best for your engine combination. You don’t have to be an expert engine tuner to accomplish this – that’s the main reason why this system is called EZ-EFI. Once you understand how the system works, you can use the 2.0’s powerful software to really make your engine run sweet.
We’ll focus our attention in this story on the ignition side of things and follow with a separate story on fine-tuning the fuel side. We chose the ignition side first because there’s more to understand, and also because once the ignition side is tuned, you can then return to the fuel side with possible further enhancements. In the EZ-EFI 2.0 instructions, it recommends attending fuel control first to get the engine running properly with an existing spark control system. Once you are satisfied with the fuel side of things, then you can convert to ignition control. We’ll assume for this story that the fuel system is working properly and that you can spend a little quality time with additional improvements.
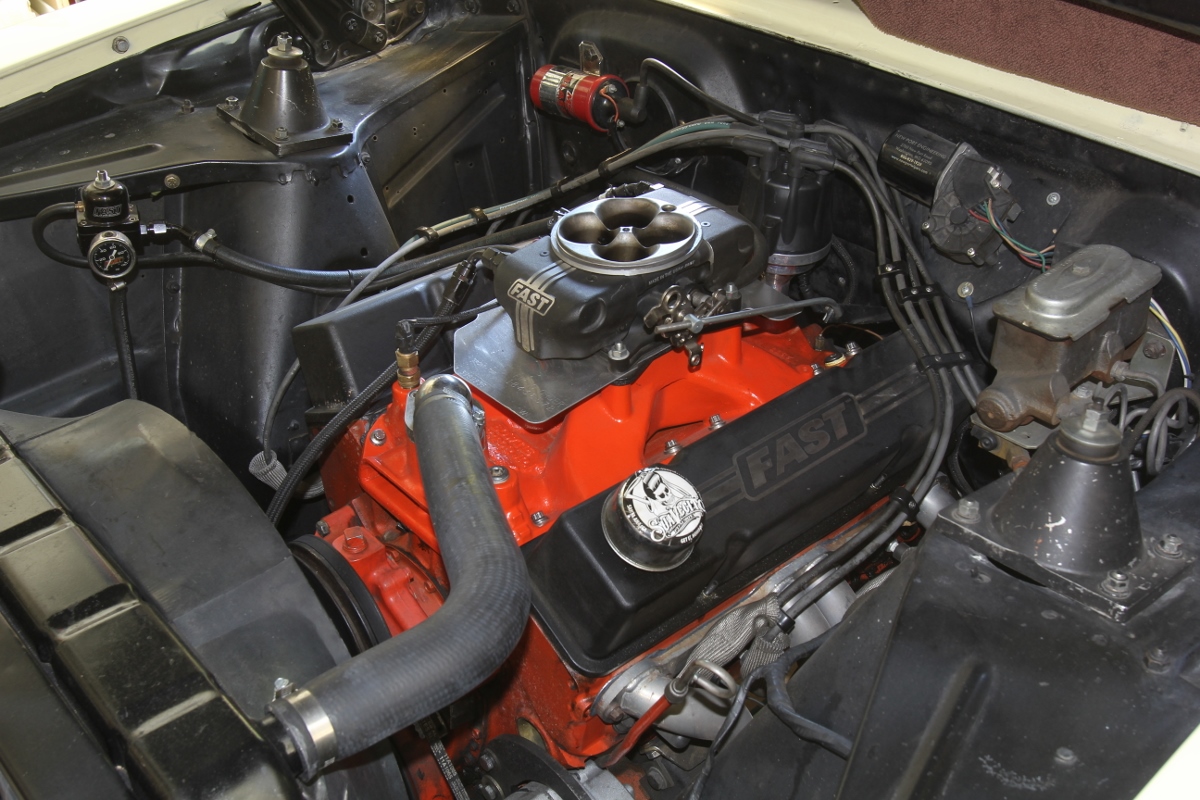
This is the engine compartment on Bianchi’s 355c.i. Nova. The car is a four-speed with 3.08:1 rear gears, so improving off-idle performance is important since the majority of his driving is around town at part throttle.
We’ll also assume the distributor is setup properly and the rotor phasing is correct. This is a crucial step. If this has not been accomplished, you must start there. We have published a story in Power & Performance News on how to properly establish rotor phasing, so we won’t go through all those steps again here. But, it is essential to have the rotor properly phased with electronic spark control because of the wide span in timing the engine will experience. If the rotor is not properly phased, performance will be seriously degraded.
It’s also worth noting that changes to the ignition curve will often affect the fuel side of things. For example, idealized part-throttle (low load) ignition timing can often result in the engine requiring less fuel either at part throttle and/or light acceleration. Timing and fuel are the major tuning parameters and they most certainly overlap in how they affect engine performance, so you will see that as you change timing, this may allow additional changes to the fuel – often allowing the engine to run better with leaner mixtures at part throttle.
Let’s start by looking at the basic timing configurations that you must set. Perhaps a point here should be made that with EZ-EFI 2.0 (or any other system for that matter), there are no self-learning capabilities for the spark curve. What you set in the EZ-EFI 2.0 system is what the engine will be using. There is no adaptive learning on the spark side.
With the EZ-EFI 2.0 hand-held programmer and the ignition switch on, you will find the ignition timing parameters under the Setup Wizard on the main menu screen. Once you have entered the Setup menu, click on the Ignition Type and enter the style of ignition you are using. In our case, we will be using the FAST XDi Dual Sync distributor for our small-block Chevy.
Before we start tuning, it’s best to verify that the timing you have on your screen is actually what is delivered to the engine. This is easily done by accessing the Timing Verification screen. This locks out the timing at 20 degrees. Then, use the timing light to verify the timing at the crankshaft is 20 degrees BTDC. If it is not, you can either manually adjust the distributor or do so electronically using the hand-held. Either way works.
After the timing is verified, you can then go back to the main screen, click on Advanced, and then Ignition Timing. This screen offers three adjustments. The first is initial timing, which is the amount of advance before top dead center (BTDC) at idle. The second parameter is what FAST calls All-In timing, which is the total advance. This is displayed as a combination of initial, plus what used to be called mechanical advance. So, if the initial is 15 and the All-In is 35, then the system will add 20 degrees of “mechanical” advance – 15 + 20 = 35.
As you can see by the Mechanical Advance graph, there is a slope created between initial and when total, or All-In, timing is achieved. In the days of mechanical advance mechanisms, this curve was determined by weights and springs. Those mechanical devices required experimenting mostly with the springs to create the optimal curve. But with digital control, you can create an optimal curve in a moment by merely pushing a few buttons.
Choosing the rpm at which the total timing is achieved will determine the rate of advance – or the steepness of the slope. If we want a shallow slope (not steep) with a given amount of total advance, then we would merely put the All-In rpm at a higher engine speed, such as 4,000 rpm. If we wanted a steeper (quicker) slope with the same total timing, then we would move the All-In rpm to a lower speed, like 2,500. Advance always begins just past idle.
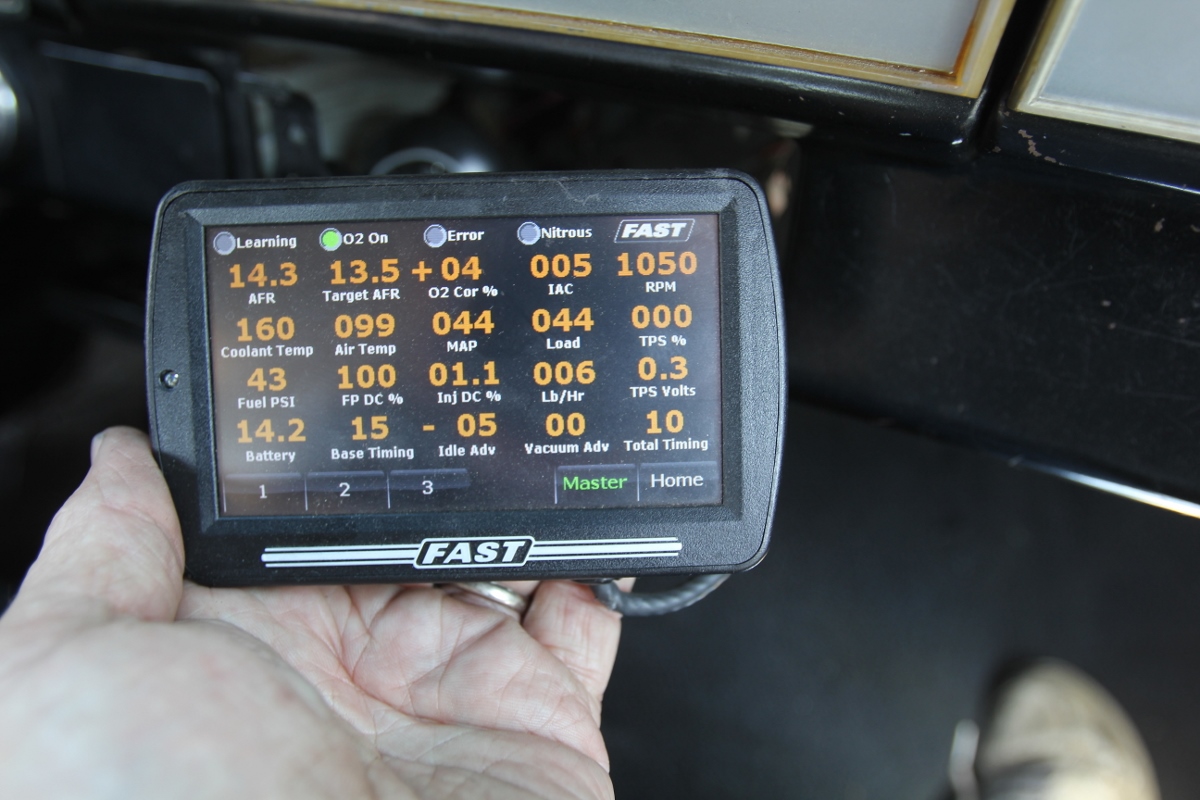
The Master screen is a great way to monitor multiple engine parameters. There are other screens that look better, but this one gives you all the important input and functional data. Note here how the inlet air temperature is 131 degrees with an outside temperature of only 78 degrees. We think a fresh-air inlet system would drastically reduce the inlet air temperature and allow the engine to run better at low speeds.
As an example, let’s say we’re working on a 355c.i. small-block Chevy with 10.5:1 compression and a mild 220-degrees at 0.050 hydraulic roller camshaft. We know this engine wants 34 degrees of total timing to make best power at WOT. However, this combination should make really good cylinder pressure at lower engine speeds, so an aggressive, quick curve might add timing too soon and perhaps cause detonation at low speeds, like 2,500 rpm. To compensate, all we have to do is set our All-In rpm at a higher engine speed, like 3,500. This will slow the rate of timing advance and help keep the engine out of detonation, even though the total is still the same.
The test would be to set the All-In rpm at a higher engine speed and then, if the engine doesn’t rattle during a lower rpm WOT test, go back and lower the All-In speed by a few hundred rpm and test again. Keep reducing the All-In rpm until the engine begins to detonate (ping) at heavy throttle at these intermediate engine speeds. We’ll assume the vacuum advance is disconnected at this point.
Conversely, let’s say we have a very mild engine with only 8.5:1 compression and a near stock camshaft. This engine will not make as much cylinder pressure, and engines like this respond very well to more timing at lower engine speeds. So, this is where we can be more aggressive with the All-In rpm with a number like 2,500 rpm. Then, if the engine rattles at somewhere around 2,600, raising the All-In speed to 2,700 or 2,800 rpm will probably minimize the problem.
Once these parameters are set, we still have another tuning ace up our sleeve – vacuum advance. To access this setting, start by toggling the Advance tuning category from the Main Menu. Then, choose Ignition Timing and click on Vacuum /Idle. This screen will allow you to enable the vacuum advance. The default setting for EZ-EFI is with this setup turned off, so it first must be enabled by clicking the “On” button.
The screen offers two areas for advance: the amount of vacuum advance and a threshold setting. The total advance is relatively simple; merely toggle the + or – buttons to create the total amount of vacuum advance you wish. The range of possible vacuum advance is from 1 to 25 degrees. Remember, this is timing in addition to the mechanical advance curve, as long as there is a given amount of manifold vacuum.
The threshold value requires some explanation. Vacuum advance is best thought of as load-based timing. This means the engine will respond positively to added timing when the engine is under light load. This is exactly how late model OE timing curves are created. In the old days, load was most easily measured with a vacuum gauge, with light throttle (light load) indicated with high vacuum readings around 15 to 20 inches of mercury (“Hg). Late model EFI engines use a manifold absolute pressure (MAP) sensor to measure manifold vacuum, so the MAP sensor is essentially the digital sensor equivalent of the vacuum gauge.
The EZ-EFI vacuum threshold setting allows the tuner to choose a point in manifold vacuum where maximum advance begins to decay, so that by WOT, no more vacuum advance is added. We’ve create a graph showing how this works, with the blue line representing a maximum vacuum advance setting of 18 degrees BTDC. This is the amount of timing added at any engine speed, as long as manifold vacuum is at or above 50 percent of maximum load.
This might seem a little confusing at first, but it’s really not complicated. To use some simple numbers, we’ll assume a maximum manifold vacuum level at 20 inHg. Our graph indicates we’re adding 18 degrees of advance at this high manifold vacuum level. This is represented by the flat portion of the blue line in the upper left corner of the graph. We set the threshold for the blue line at 50 percent. This is the point on the blue line where the slope begins to tip over, adding less timing. Let’s call this the knee point. Since 50 percent of 20 inches is 10 inches, this is where the EZ-EFI computer begins to reduce timing. As the throttle opens and manifold vacuum drops, the slope will continue to add less timing until there is zero advance at WOT – or 0 inHg.
The red line represents the same amount of maximum vacuum advance at high vacuum (18 degrees), but changes the threshold to 30 percent. This repositions the knee point on the curve, reducing the amount of timing added as the load increases. If we added a third line with a 70 percent threshold, it would maintain more advance as the manifold vacuum drops, but would pull the timing out more quickly (a steeper ramp) so that zero timing was added at WOT. If you study the graph for a few moments, this should become clear.
Of course, you are not limited to coarse threshold changes. This means you can choose a threshold of 53 percent or 62 percent, or any number between 1 and 70 percent. Obviously, a threshold of 100 percent would add vacuum advance even at WOT, which defeats the purpose of load-based timing. Conversely, a minimum threshold of 10 percent, for example, would begin retarding timing almost at the crack of the throttle which really isn’t beneficial since load may not affect timing until roughly 30 percent.
Idle Trim is another cool feature offered with the EZ-EFI software. The adjustment is the amount of timing added or retarded from the initial timing number at idle, compared against idle speed fluctuations. While it would seem this should be the idle air control (IAC) motor’s job, it reacts too slowly. Adding or retarding timing is far quicker. For example, if the engine speed drops, the ECU will add timing to increase idle speed. If the idle rpm is too high, it can retard the timing. It’s best to input small numbers (less than 5 degrees) to offer minor changes. All of this is an attempt to stabilize the idle speed. Of course, you can certainly disable this feature if a lumpy idle is what you seek.
Final recommendations include keeping a written log of your changes. Because it is so easy to make quick changes with just a couple of key strokes on the hand-held, it’s very easy to get lost. We know because we’ve been there. So, the best recommendation is to make one small change at a time and then drive the car. Often, it may take a few days and several miles over a wide variety of driving situations to properly evaluate the change you’ve made.
Small changes are important because it’s possible to overshoot and potentially miss the sweet spot. Small changes can also not necessarily produce a change you can feel, but several small changes will certainly create a response. The important part is to be patient and keep good records. The net result will be an engine that is extremely happy and runs like you expect. It’s not magic, but in the end, the engine will run like it’s got magic power.