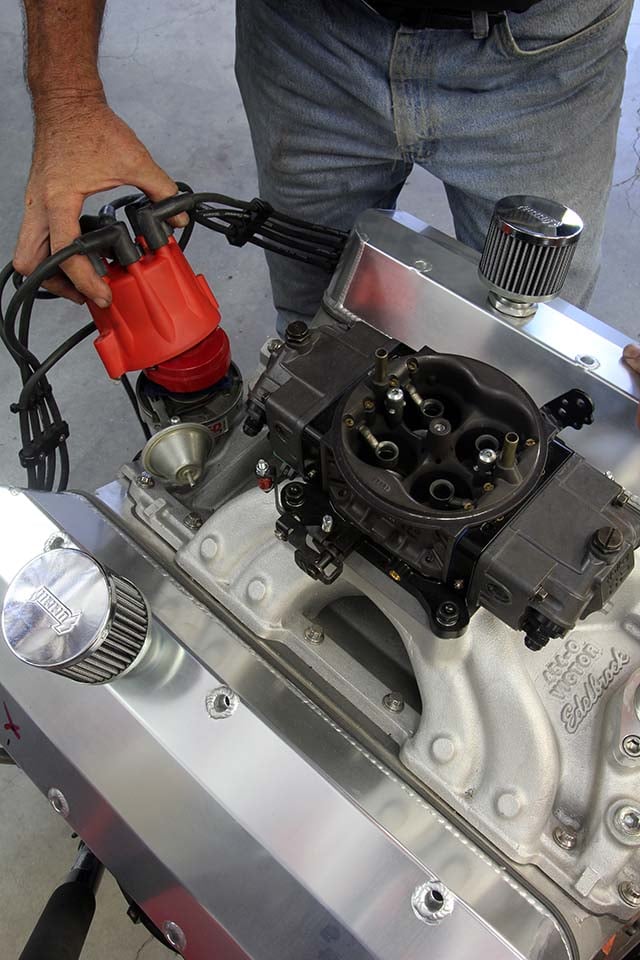
As our example engine, we’re going to use this 496ci big-block Chevy. We’ll start with the distributor in the engine. If you want, you can mark the position of the distributor to the intake manifold with a black Sharpie, but this isn’t really necessary. Because we will be turning the engine over by hand, we removed all the spark plugs to make this job easier.
By Jeff Smith
Photos: Jeff Smith
We’ve been on a basics kick recently because we’ve discovered there is a whole generation of car guys who are shy of some very essential skills. We recently finished a story entitled the Secrets of Ignition Timing when we realized that removing and installing a distributor can be a bit intimidating. If you grew up playing with GM LS engines, or a Ford Mod or Chrysler hemi, a distributor, oddly enough, is something that doesn’t exist with these later engines. But for the other four billion distributor-equipped engines in the world, it’s to your benefit to know how to remove and replace one of these devices. That’s what this story will cover.
Veteran enthusiasts with technical skills are probably chuckling at this point, but we’ve run across our share of older guys who don’t know how to install a distributor properly either, so there’s room here for everybody.
We will be using a big-block Chevy, but the process is the same for all engines. One thing you will have to know on your engine is the location of Number One cylinder. On most GM V8 engines, Number One is the front cylinder on the driver’s (left) side. Ford V8s place Number One on the passenger side front. Most Chrysler V8 engines locate Number One like the GM engines – on the driver side front. Firing order is also important to setting a distributor in properly since the previous guy might not have done the job correctly. All this information can be easily found on the internet.
Ripping engines and ignition systems apart is easy. The hard part is getting it back together properly. We’ll show you all you need to know to make all this happen, and no custom or special tools other than hand tools are necessary to complete this task. Then you can show off your prowess to your friends the next time one of them has become lost in the battle to get his engine to run right. We will show you how to find your way out of that mixed up distributor jungle and make your engine run like a champ. So get out your tools and let’s get to work.
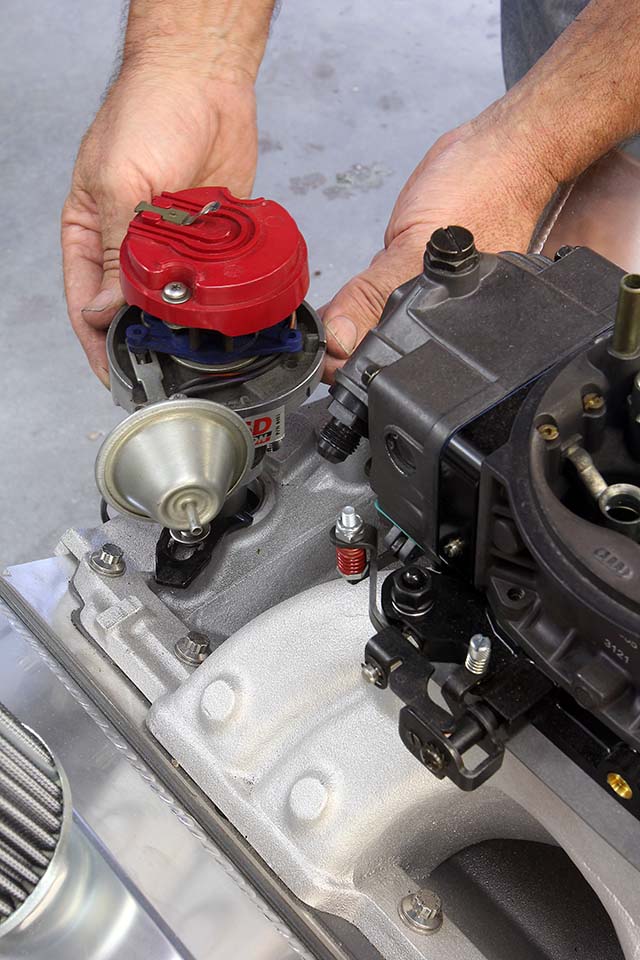
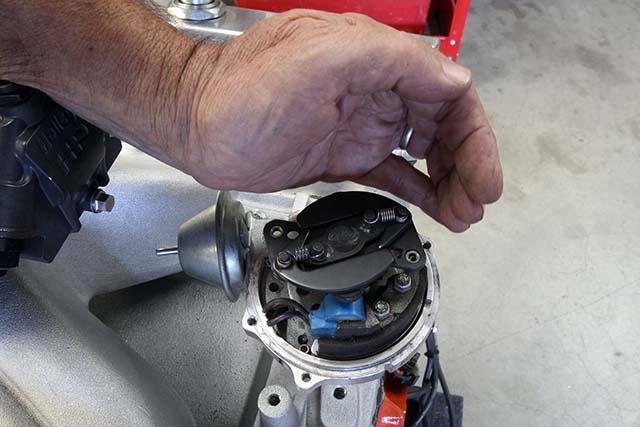
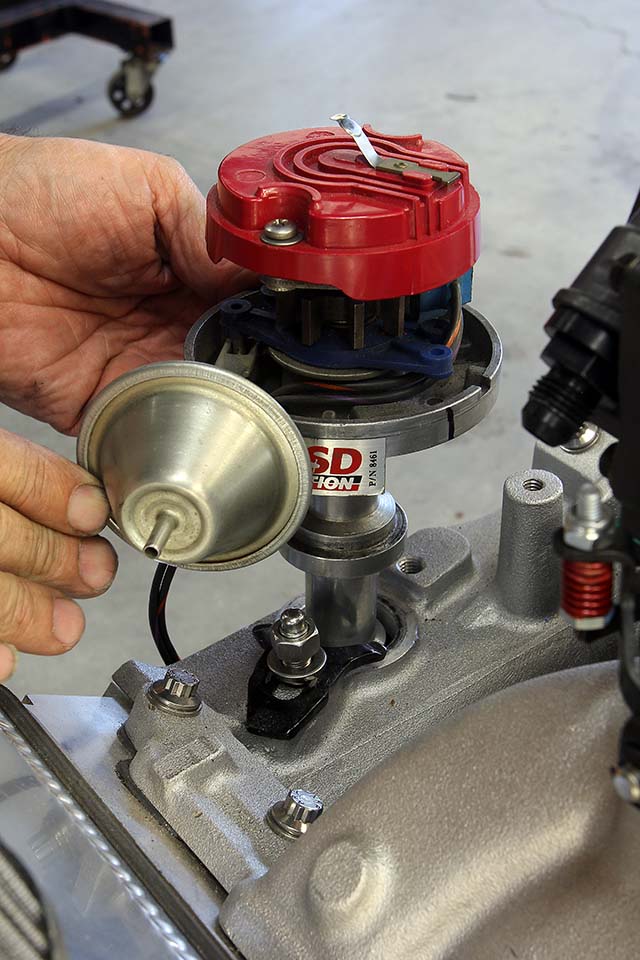
After removing the distributor cap and rotor, we removed all electrical connections to the coil and have loosened the bolt or stud and nut arrangement that holds the distributor clamp. Now remove the distributor from the engine. Note that the rotor will turn as the distributor is removed. This is due to the helical cut on the distributor gear. We don’t need to note the position of the rotor because we’re going to show you how to replace the distributor as if this was a brand new engine.
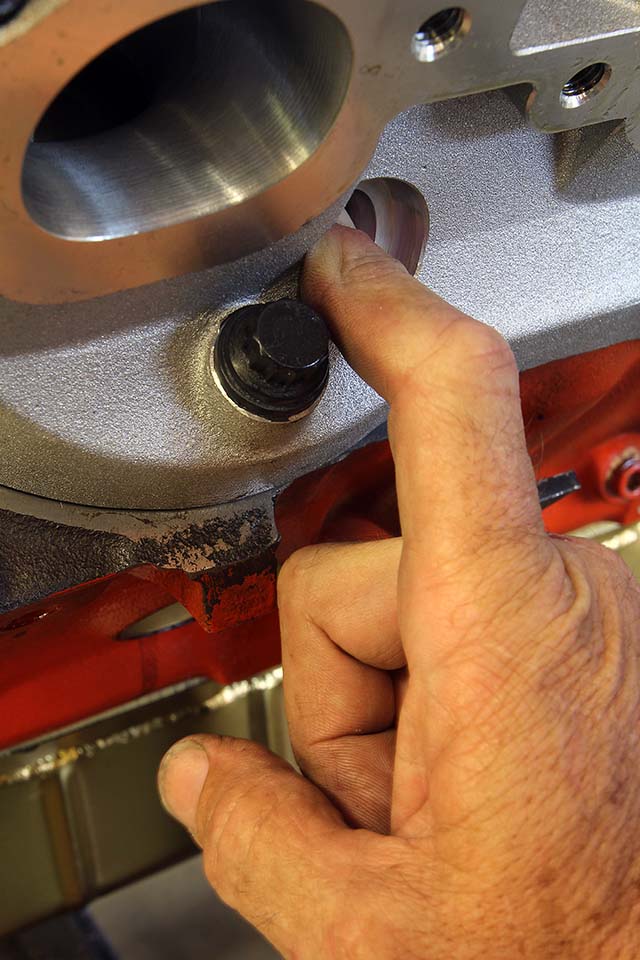
We’ve turned the engine to some unknown position so that now we don’t know where we are relative to Top Dead Center (TDC) on Number One cylinder. That’s what we must find first. In our case, we will turn the engine over using the crank bolt. If the flywheel is accessible, you can also turn the engine over by using a long screwdriver placed between two long crank bolts. Or, if the engine is in the car, you can bump the starter motor to turn the engine. Place you finger over Number One spark plug hole (driver side front on a Chevy) and turn the engine over until you feel pressure build.
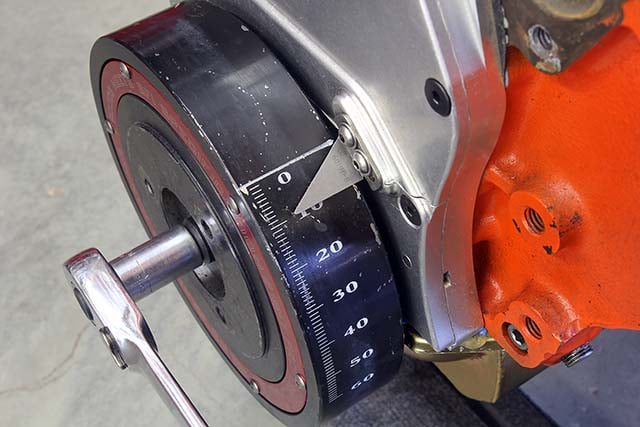
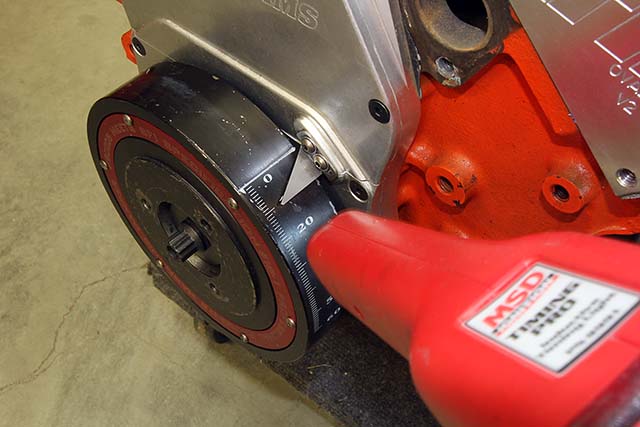
Now reference the crankshaft and timing mark. If the engine doesn’t have a timing mark, we’ve also ran a story recently on how to find TDC on an engine. So you will need to reference that story before you can go further. Assuming the TDC marker is in place, gently move the engine until we set timing at 10 degrees Before Top Dead Center (BTDC) as shown here. This will be our initial timing setting to get the engine started.
As a point of reference, if the distributor is equipped with a vacuum advance canister, you can use this to determine the direction of distributor rotation. Looking down from the top of the distributor, align your thumb with the canister and then curl your fingers around the distributor. Your fingers will indicate the direction of rotation. Chevy distributors rotate clockwise, Ford and Chrysler distributors rotate both clockwise and counterclockwise so this is a quick way to identify the rotation as this will help with installation.
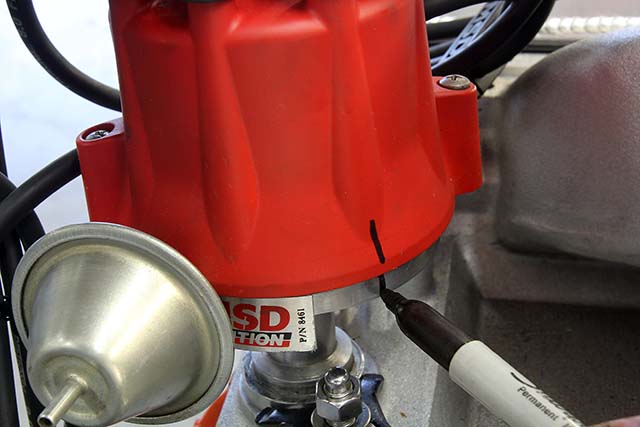
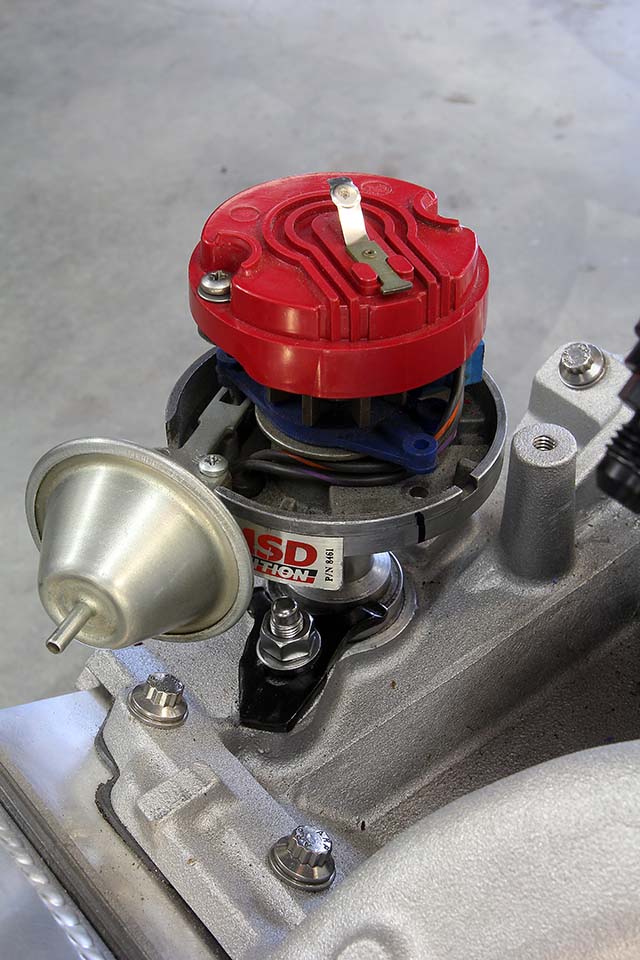
Before we slide the distributor in the engine, you need to locate the Number One spark plug wire on the distributor. This will often, but not always, be near the driver side front of the cap. This location is important because this positions the distributor in the car. You should mark the location on the cap and on the distributor body with a Sharpie to indicate Number One. This can help position the final distributor location.
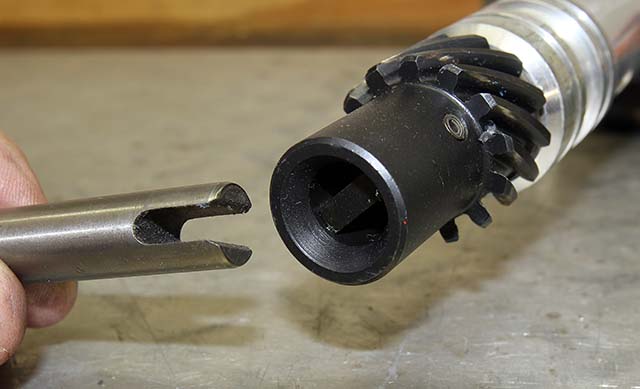
Most domestic V8 engines use the distributor to drive the oil pump. In the case of Chevy V8 engines, the oil pump drive is a straight tang that fits inside the bottom of the distributor gear. This is important because this tang may not line up even when the distributor installed properly. We’ll deal with that in a later caption. If the distributor is new, coat the distributor gear with engine oil or white lithium grease to lubricate it until the engine fires.
Make sure the distributor has a gasket. Slide the distributor in and line up the rotor so that it is roughly 15 degrees counterclockwise from its proper position relative to the engine. Start by engaging the teeth in the cam gear with the distributor gear – this will rotate the rotor (in our case) clockwise. If the rotor moves into a position that is close to the reference mark on the distributor for Number One – this is where you want to be. If the rotor does not line up with the Number One spark plug mark on the distributor, simply pull the distributor and move it roughly one tooth in the proper direction and drop it back down into the engine and recheck your work. This is the right way to do it because this maintains the proper position of the distributor cap to the engine.
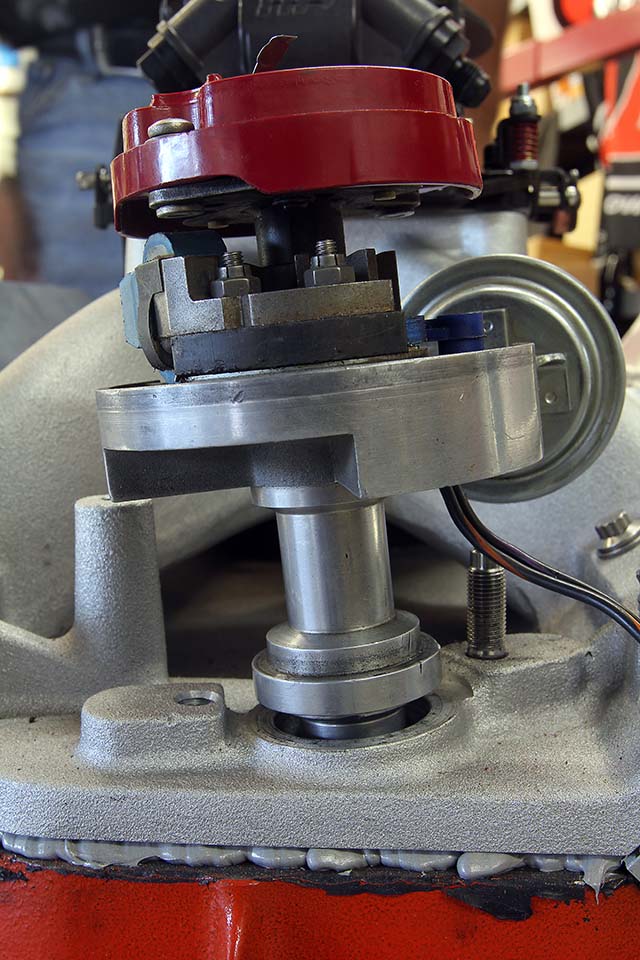
When the distributor drops into place with the rotor pointing roughly toward Number One spark plug wire reference mark, you will notice that the distributor is not fully engaged and flush with the intake manifold. This is normal. Remember the oil pump drive slot and tang we mentioned earlier? In most cases, that oil pump drive will not line up and will hold the distributor up by about ¼ to ½ inch. Don’t fret, there is an easy fix.
Merely turn the engine over in the normal clockwise direction until the distributor drops in place. Sometimes you have to apply a slight downward pressure on the distributor body to help it drop into place so that the distributor body is flush with the intake manifold. Now because we’ve rotated the engine, let’s double-check our distributor placement.
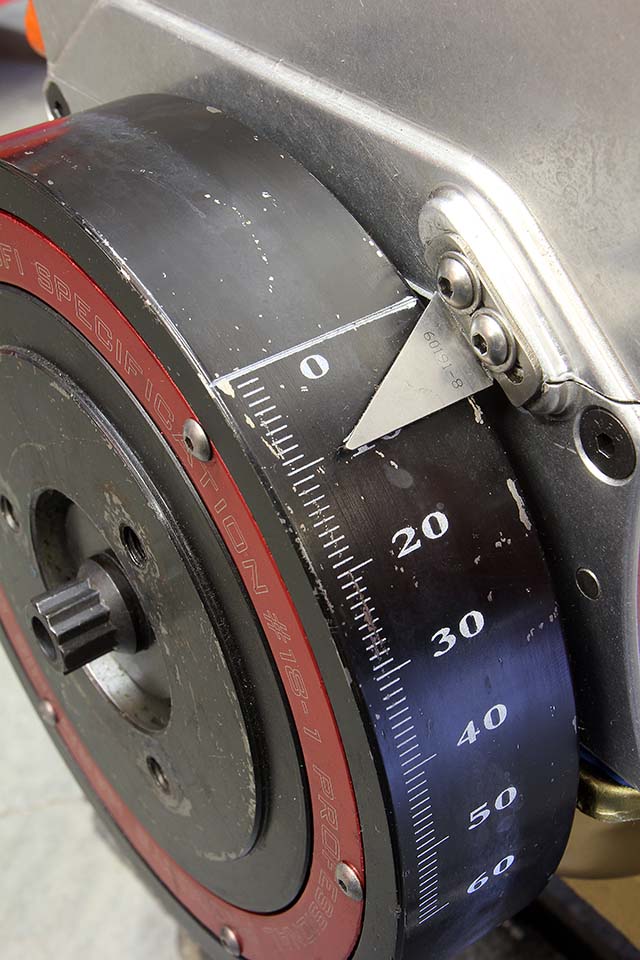
Rotate the engine around until you feel pressure with your finger on Number One cylinder and then continue to turn the engine until again the harmonic balancer indicates 10 degrees BTDC. Check the position of the rotor relative to the mark on the distributor body that indicates where Number One plug wire is on the cap. If the rotor is not lined up with the mark on the distributor body, then you can move the distributor body but if this requires too much movement you will have to remove relocate the distributor. Cinch the distributor down with the clamp but don’t fully tighten it just yet. You are just about done – the hard part is completed.
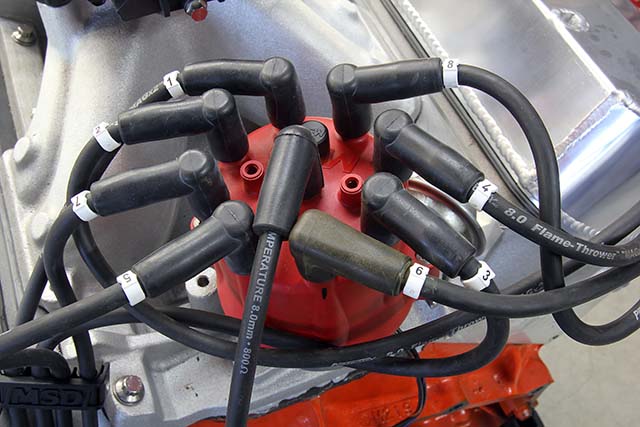
Now you can install the cap on the distributor and re-install all the spark plugs and connect the plug wires. Make sure you have the firing order correct by double checking all the wires to their proper cylinders. In our case, the firing order is 1-8-4-3-6-5-7-2. Be careful with plug wires for 5 and 7 as they are easy to accidently switch.
Now you’re ready to fire the engine and use a timing light to set the actual initial timing. With that action complete, you can fully tighten the distributor hold-down clamp and the job is complete. This sounds like a complicated program, but once you’ve done it a couple of times, it will become almost second nature.
What to do When the Engine Backfires
The most common mistake made when installing a distributor is short cuts that don’t work. This misconception is, “All I have to do is spin the engine around to the TDC mark and I’m ready to do go. I don’t have to pull a spark plug. I’ve done it before and it works!” The problem with this approach is that you have a 50-50 chance of getting it right. This is because engines have to rotate 720 degrees to complete the four stroke cycle. This means that the Number One piston is at TDC twice. The piston arrives at TDC once for the compression stroke where the spark will be initiated and again on the exhaust stroke. If you don’t pull a spark plug to feel compression building in Number One cylinder, you don’t know if you are on the compression stroke or the exhaust stroke. If you guess incorrectly, the distributor will be 180 degrees out of phase and the engine will let you know – usually with a loud backfire through the carburetor or the exhaust. If you are 180 degrees off, you must go through the whole procedure again – so the best way is to pull the spark plug and check for pressure to know Number One is on the compression stroke.